

In this guide, we explain step by step how to connect the plugin MCP Content Manager Premium with Claude, the artificial intelligence from Anthropic. Once the connection is set up, Claude will be able to manage the content of your WordPress site directly: create posts, edit pages, upload images, manage taxonomies, and much more, all through the MCP (Model Context Protocol).
Prerequisites
Before you begin, make sure you have the following:
- The plugin MCP adapter installed and activated, you can download it from here
- The plugin MCP Content Manager Premium installed and activated on your WordPress site (after activating it, it's best to save the site's permalinks to flush them)
- An account of Claude with a plan that supports custom connectors (Max Plan or higher).
- Administrator access to your WordPress site.
- Your WordPress site must be publicly accessible (not on localhost).
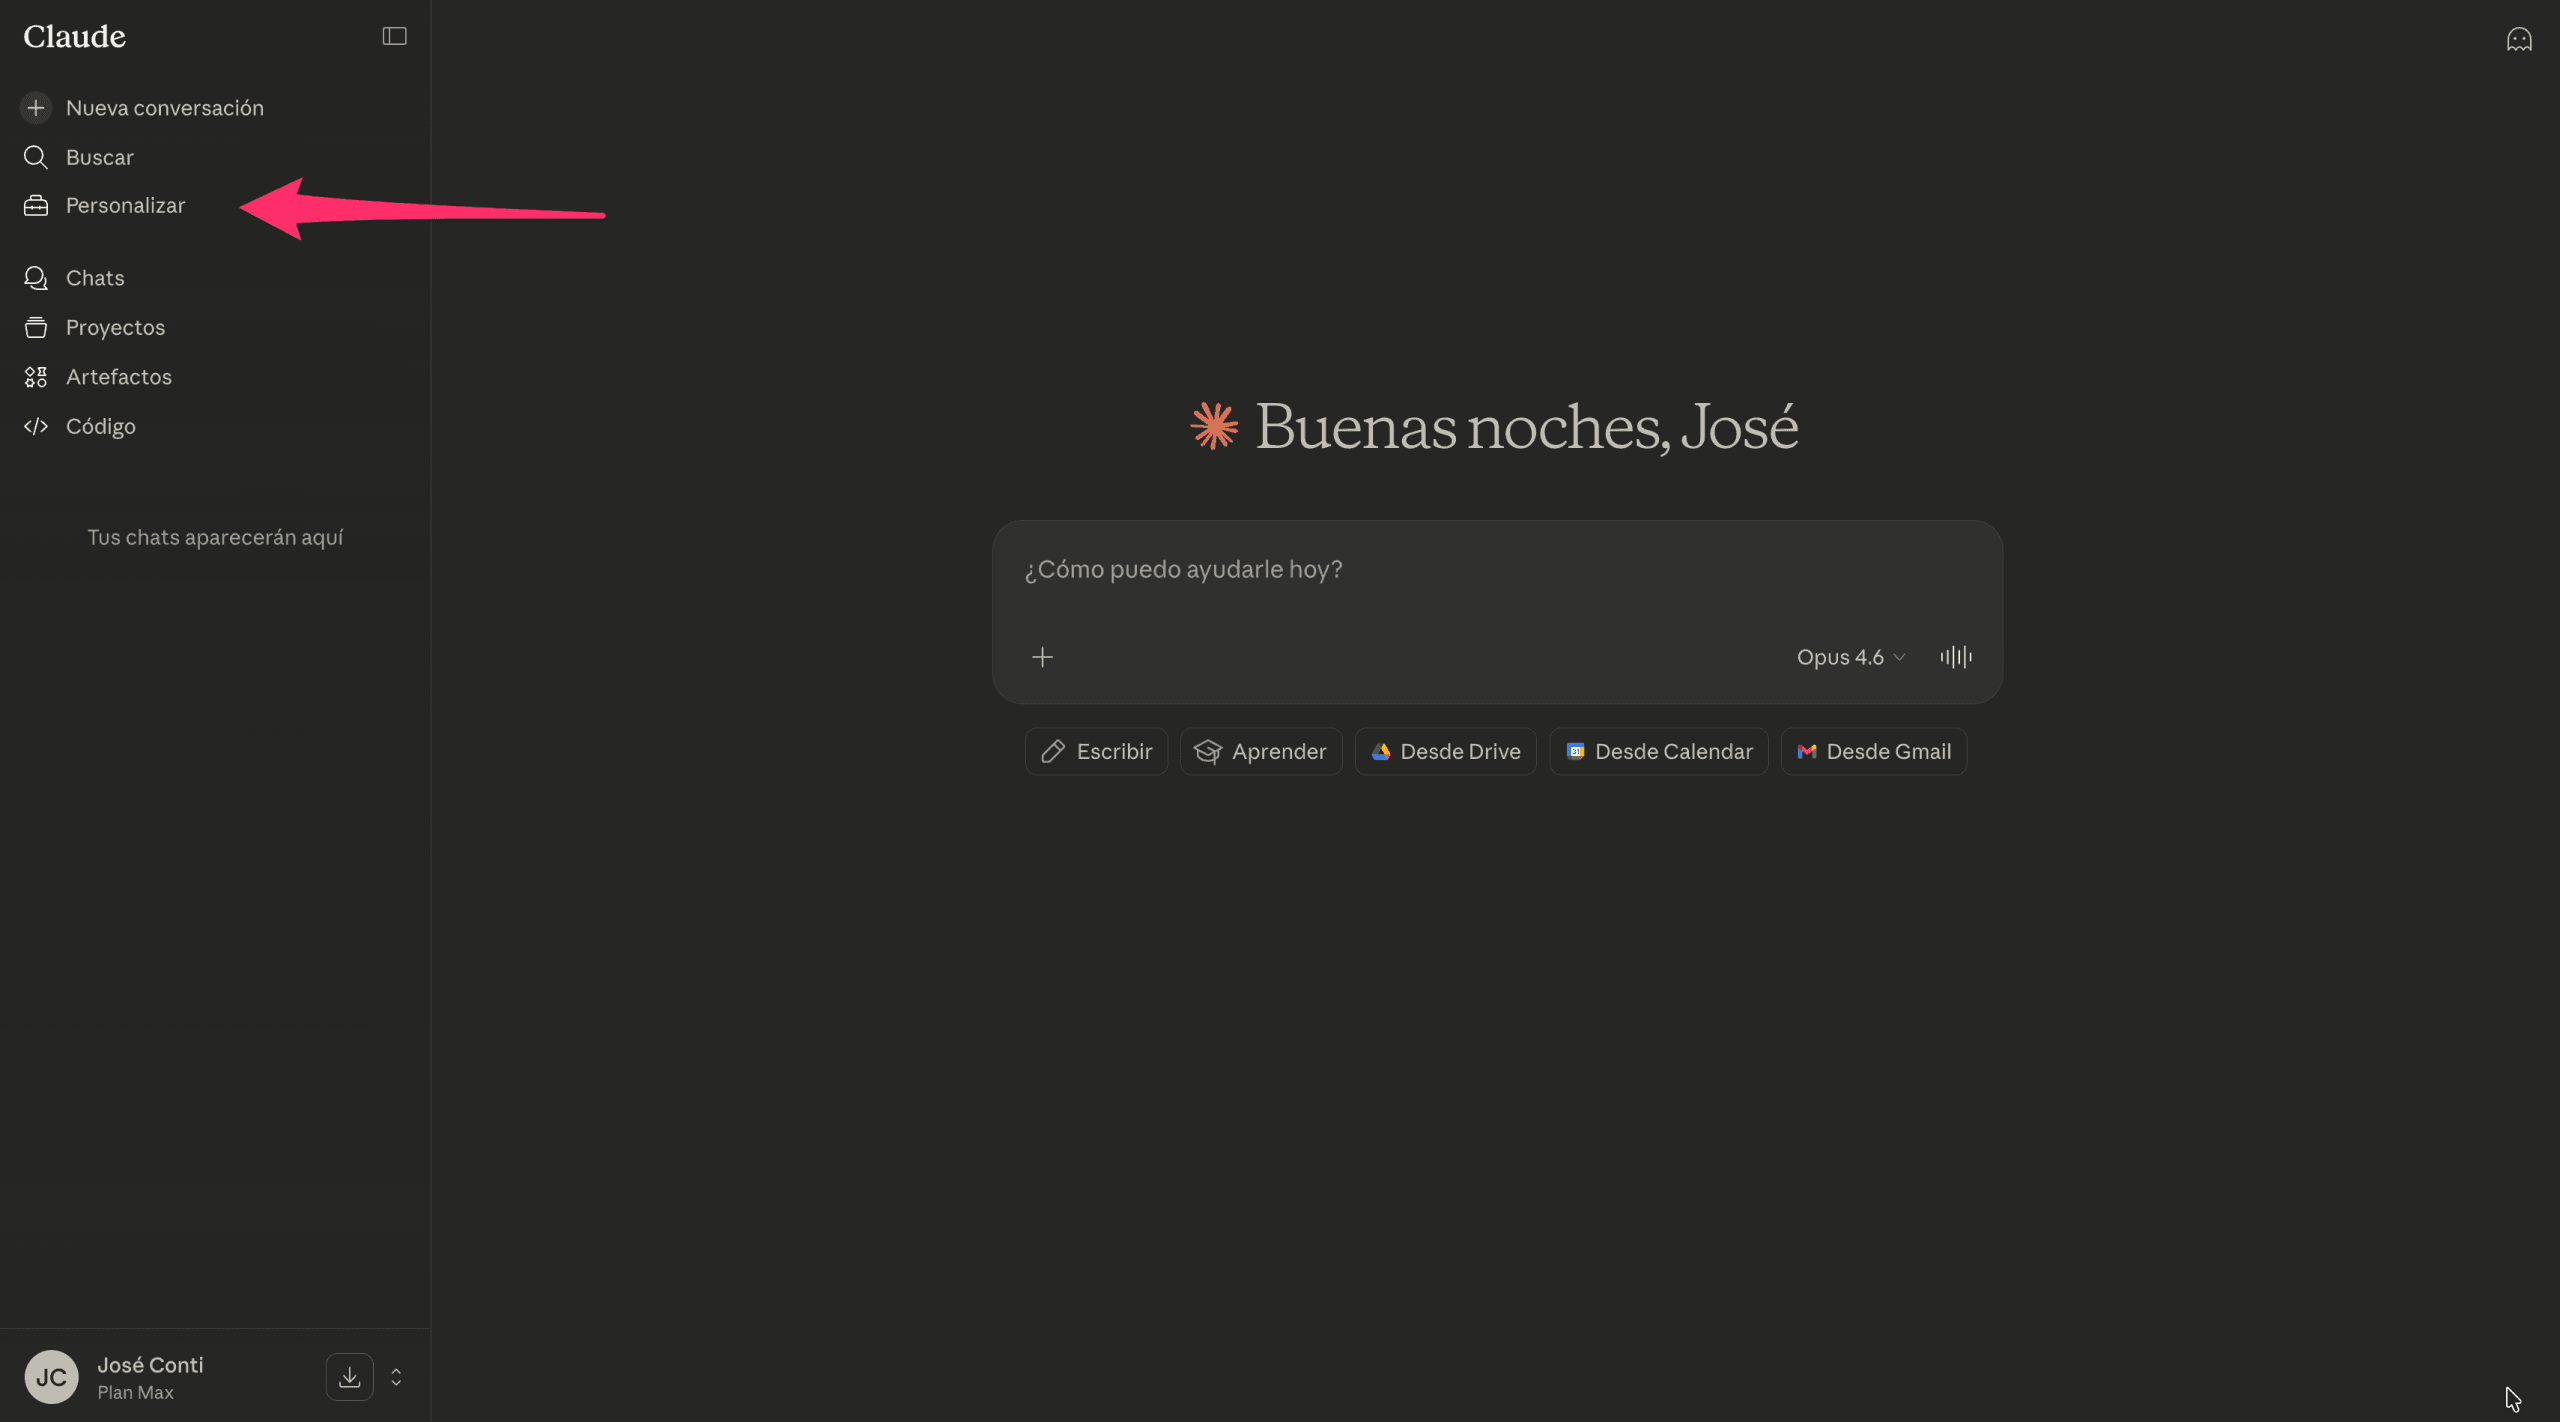
Step 1: Access the Customize section in Claude
Open Claude in your browser and log in with your account. In the left sidebar menu, click on the option Customize.
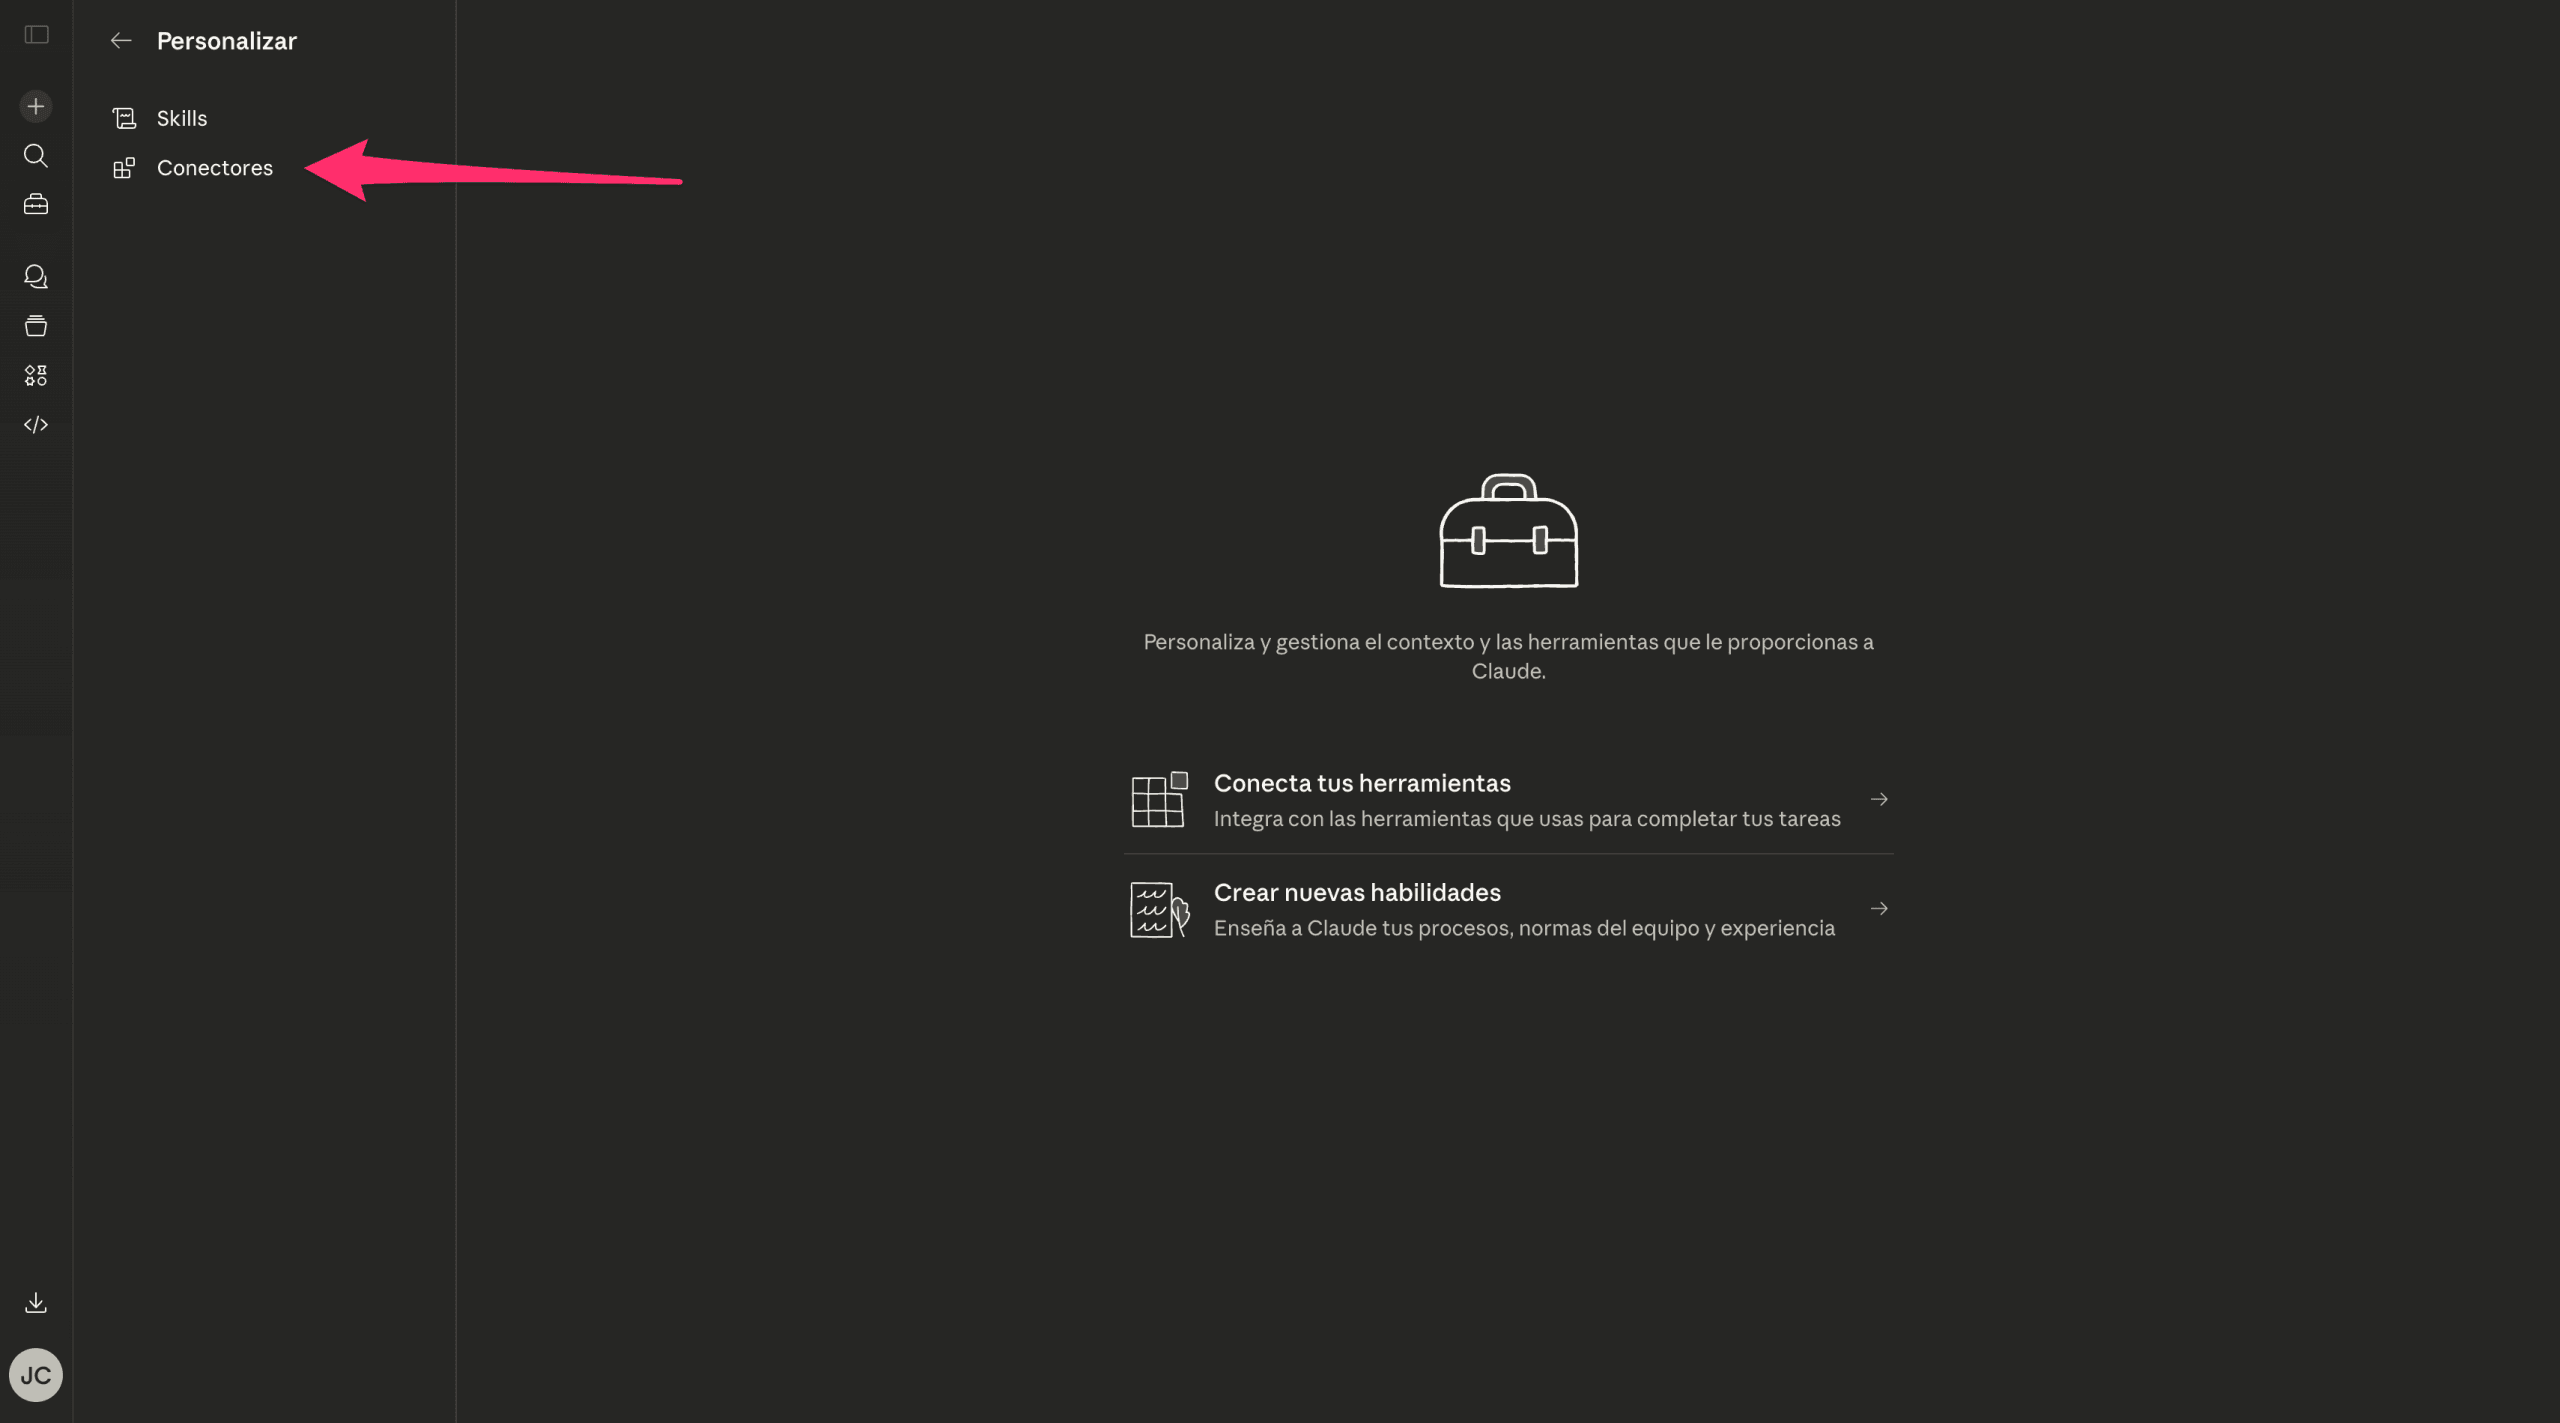
Step 2: Access Connectors
Within the Customize section, you will find two options: Skills and Connectors. Click on Connectors to access the management of external tools that Claude can use.
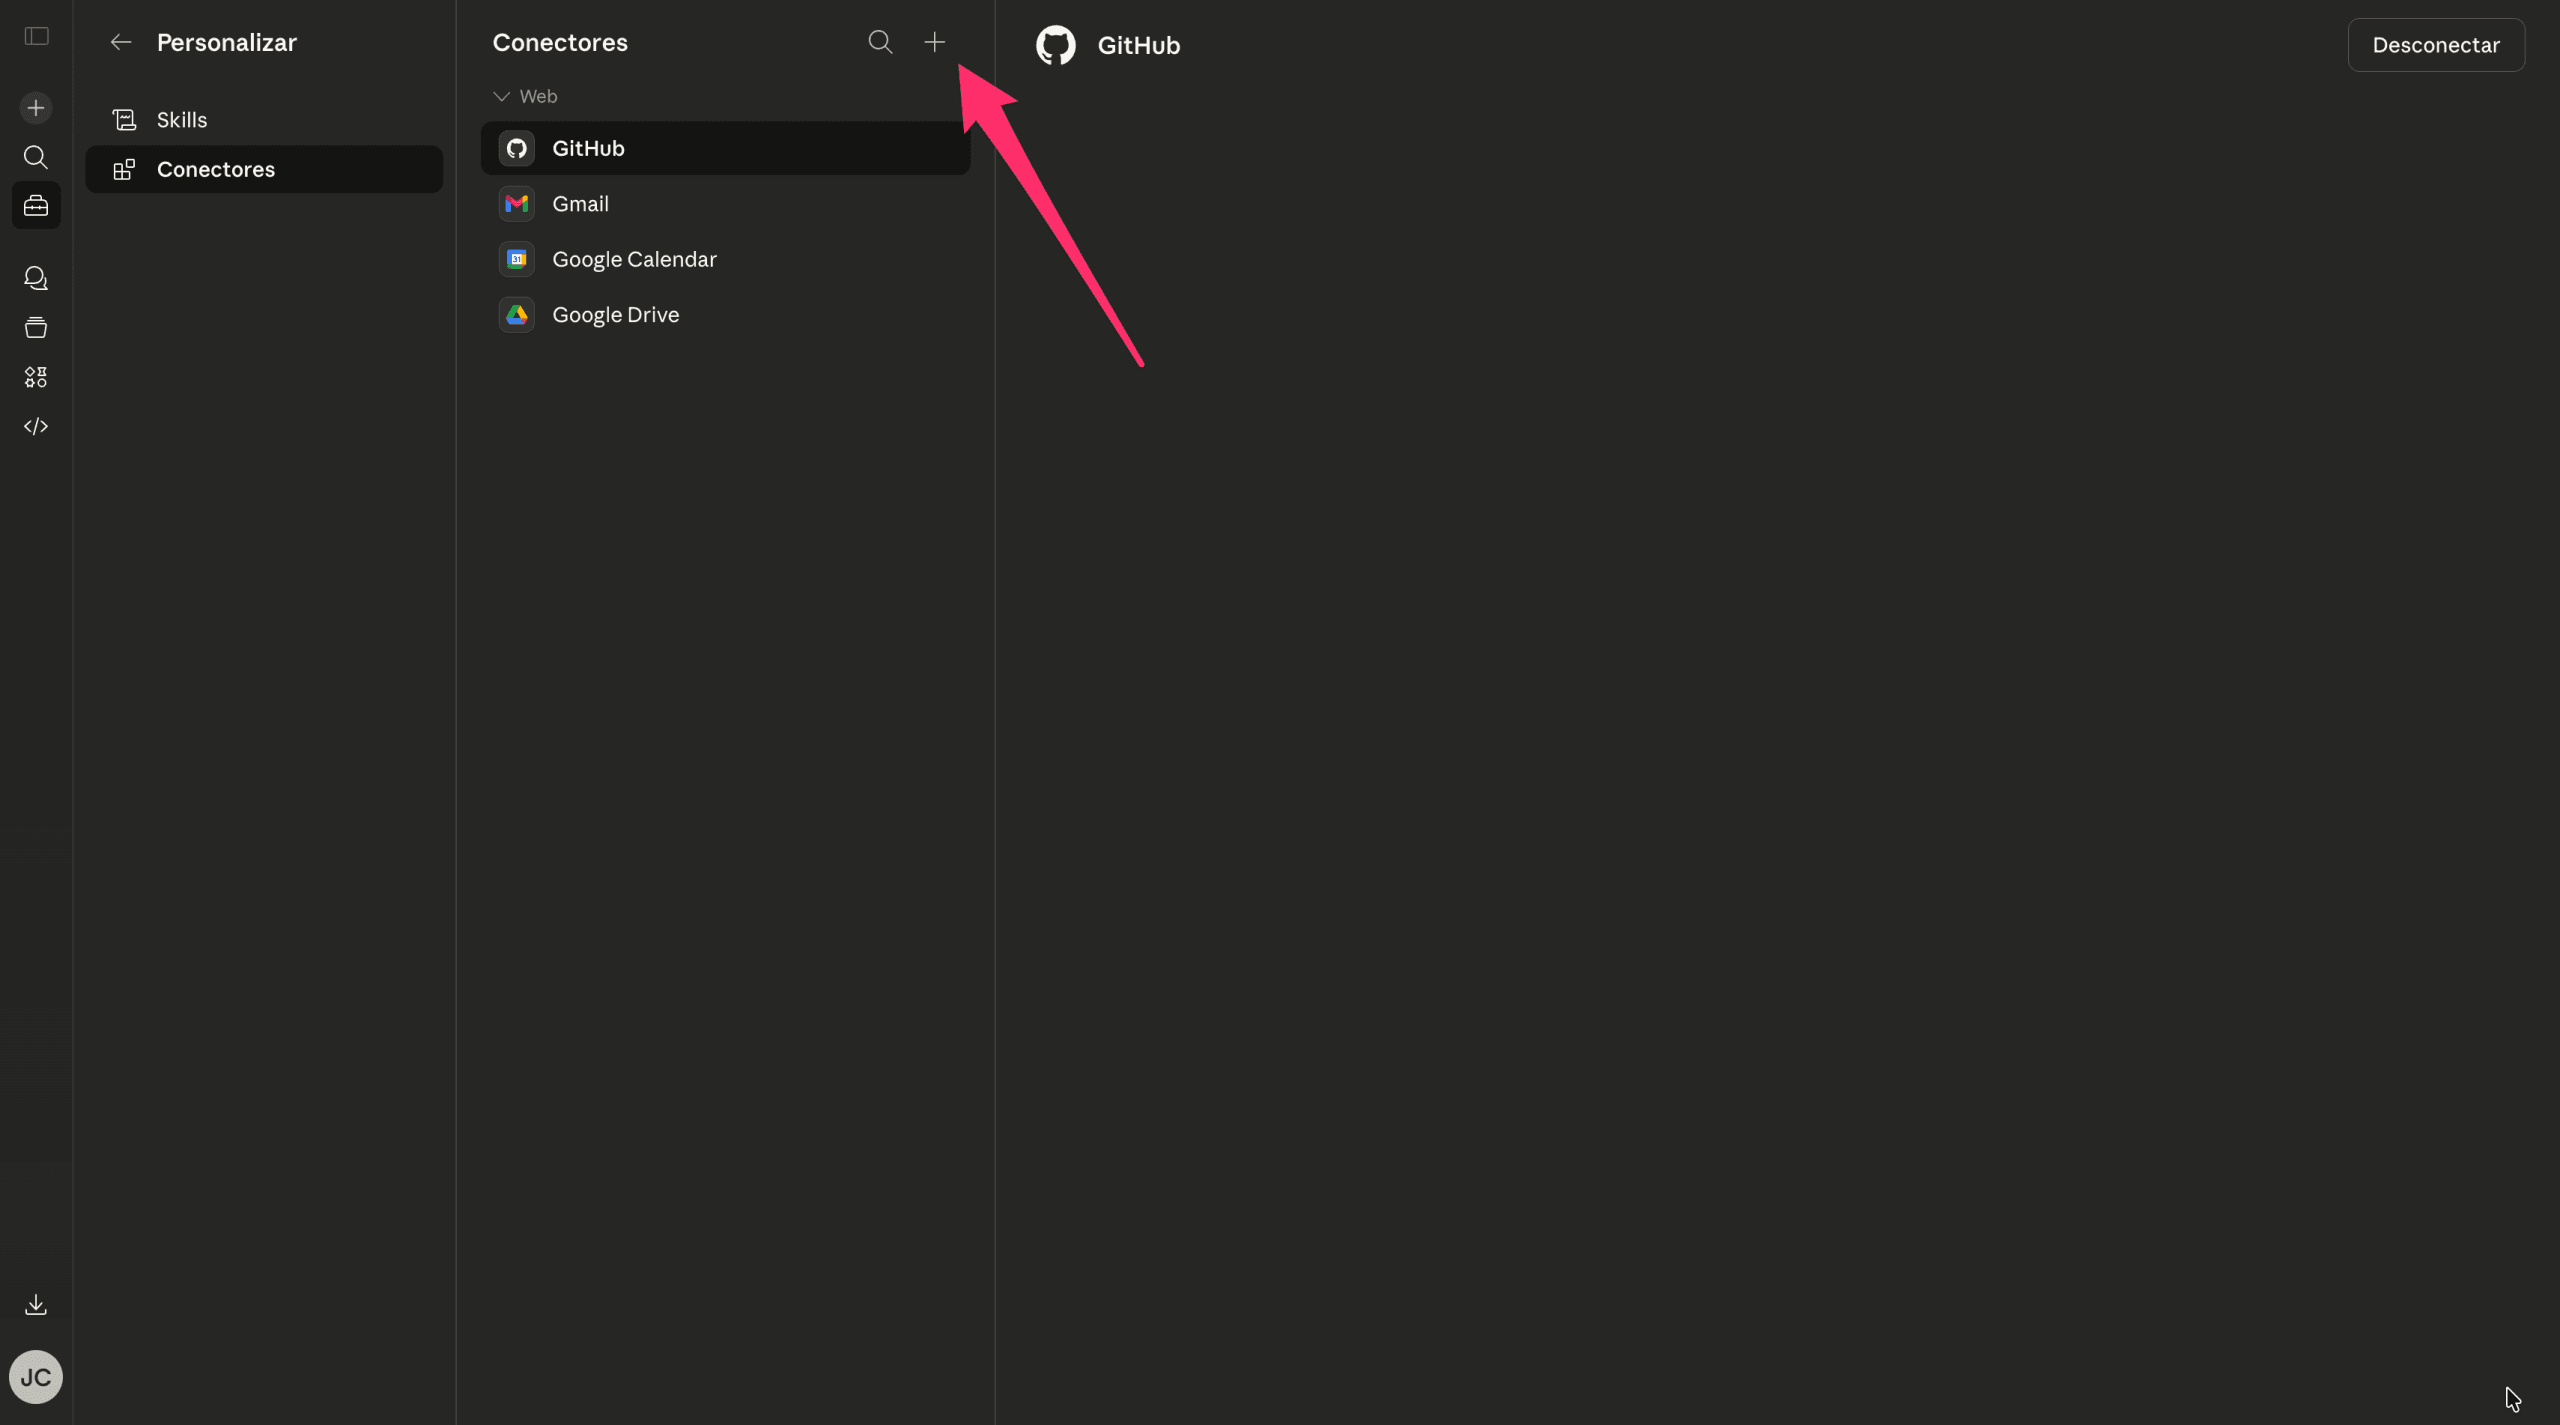
Step 3: Add a new connector
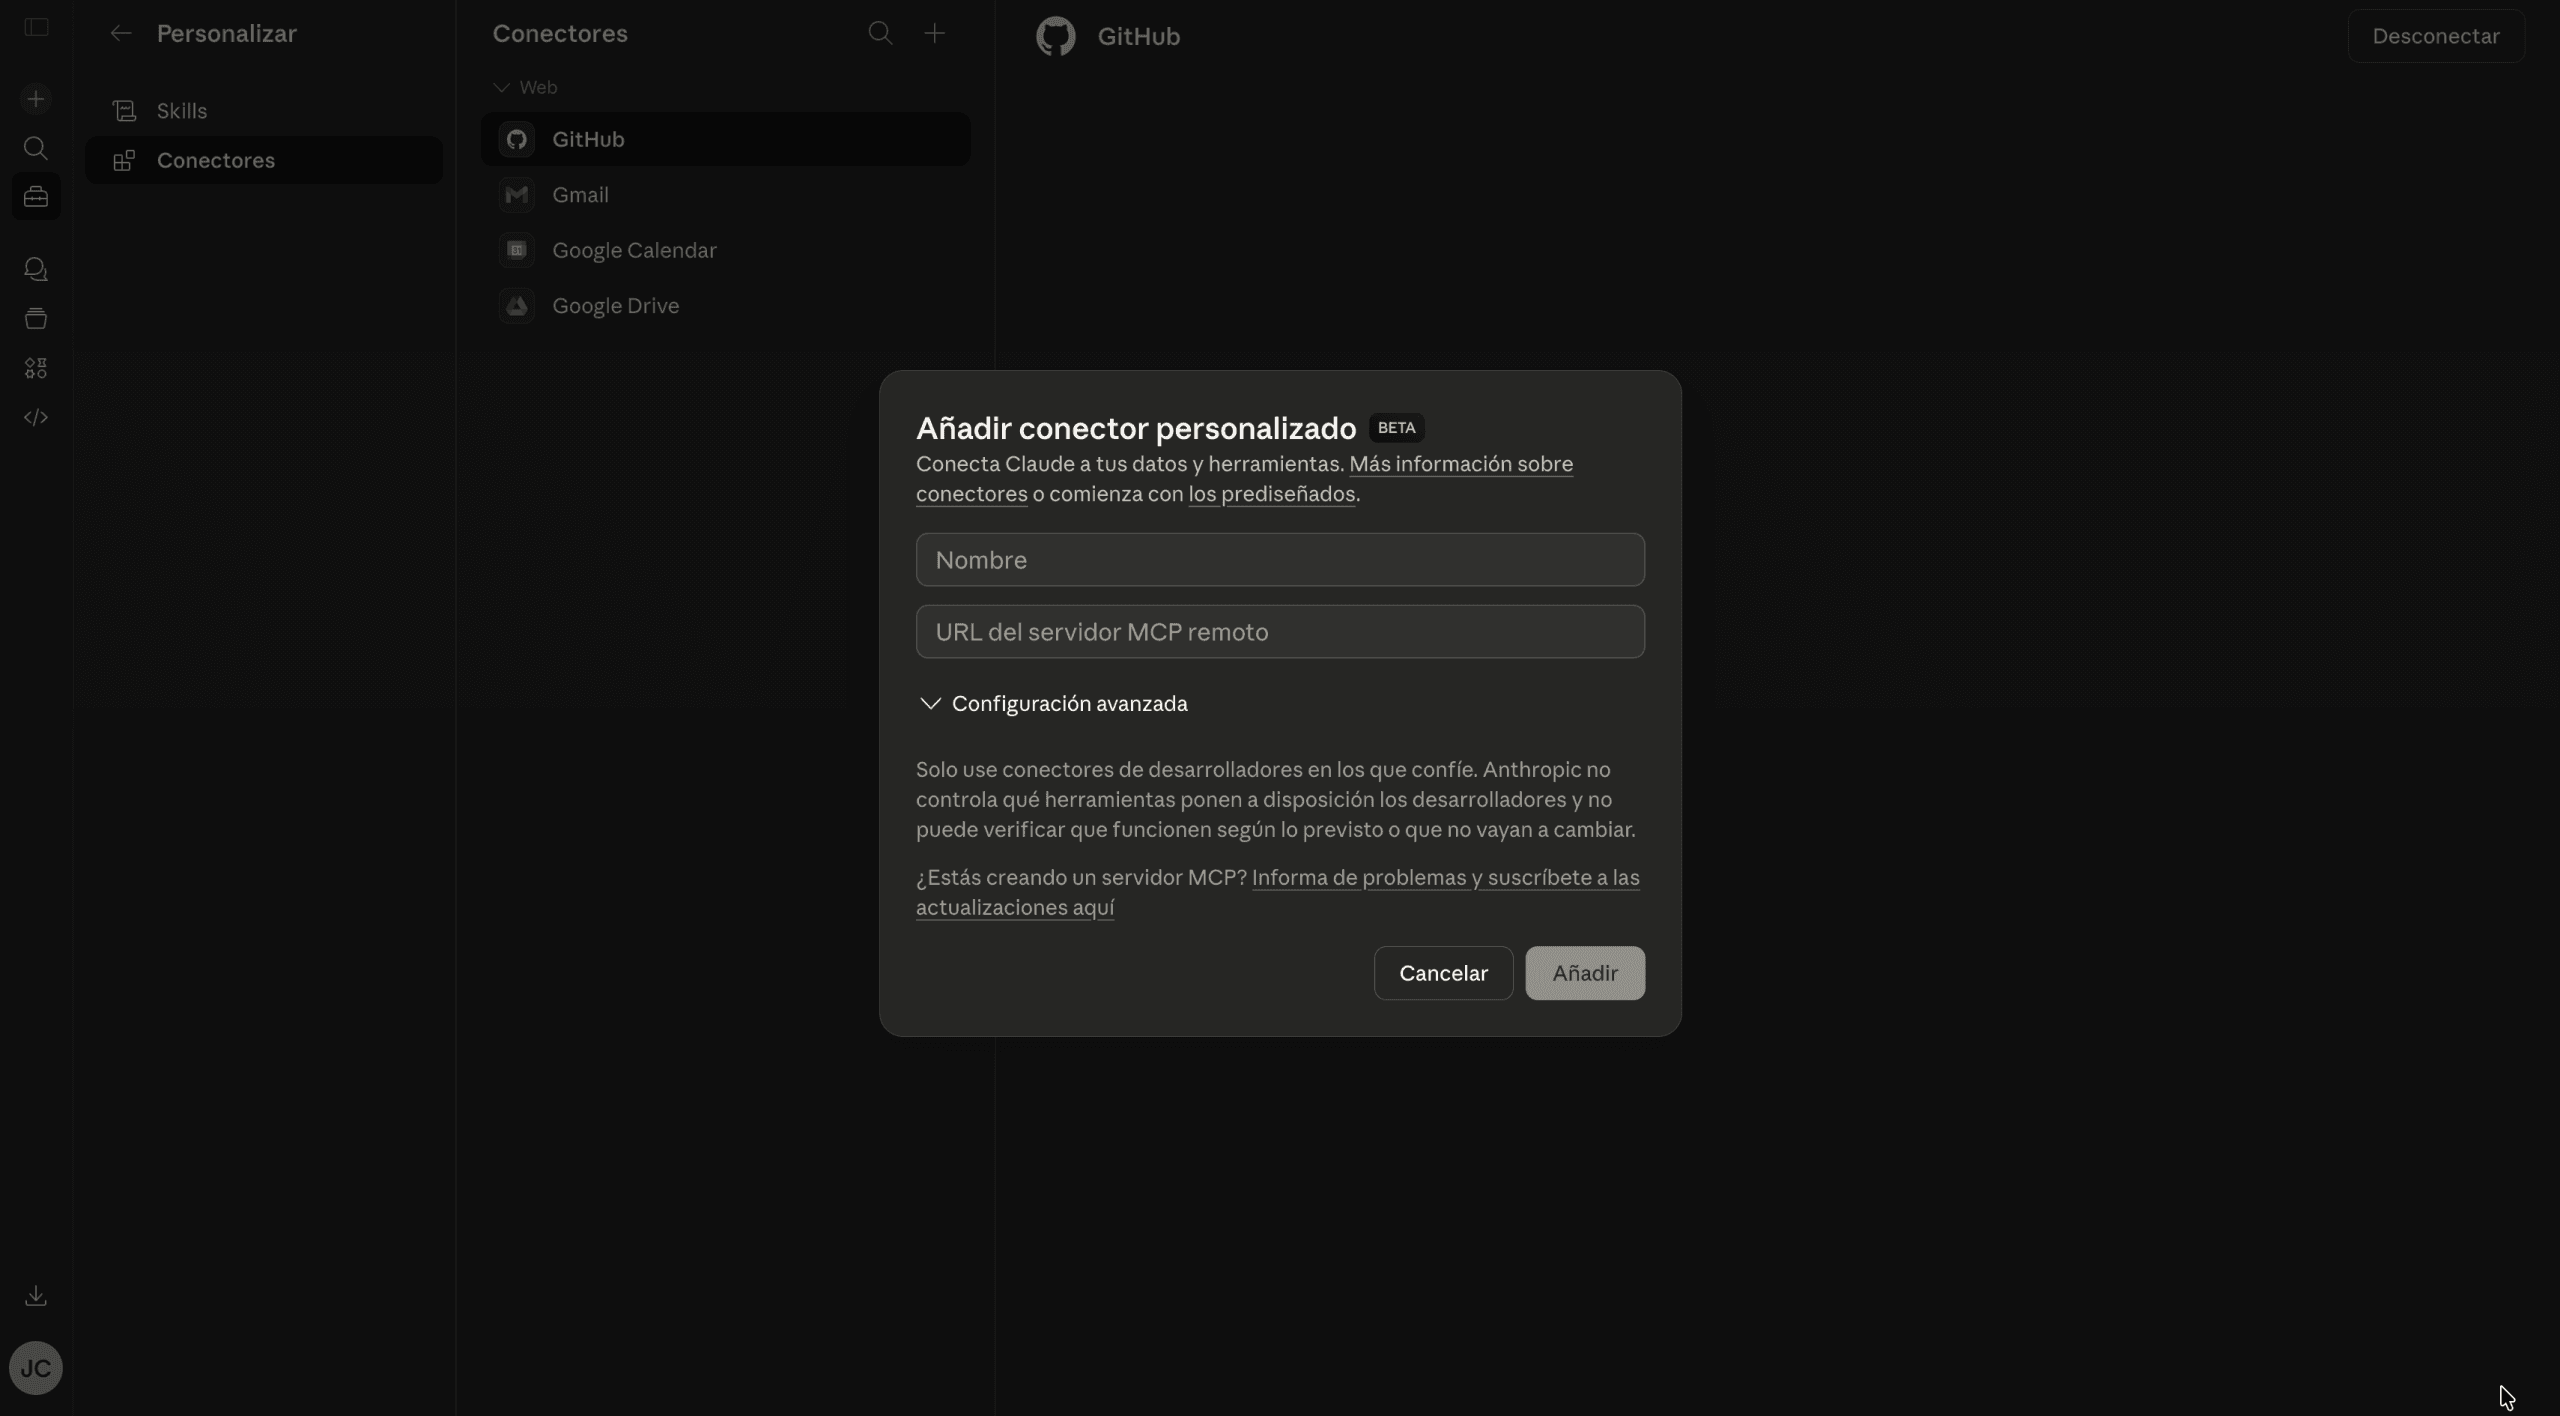
In the Connectors section, you will see the web connectors you already have configured (for example, GitHub, Gmail, Google Calendar, etc.). To add MCP Content Manager, click on the button + that appears next to the title 'Connectors'.
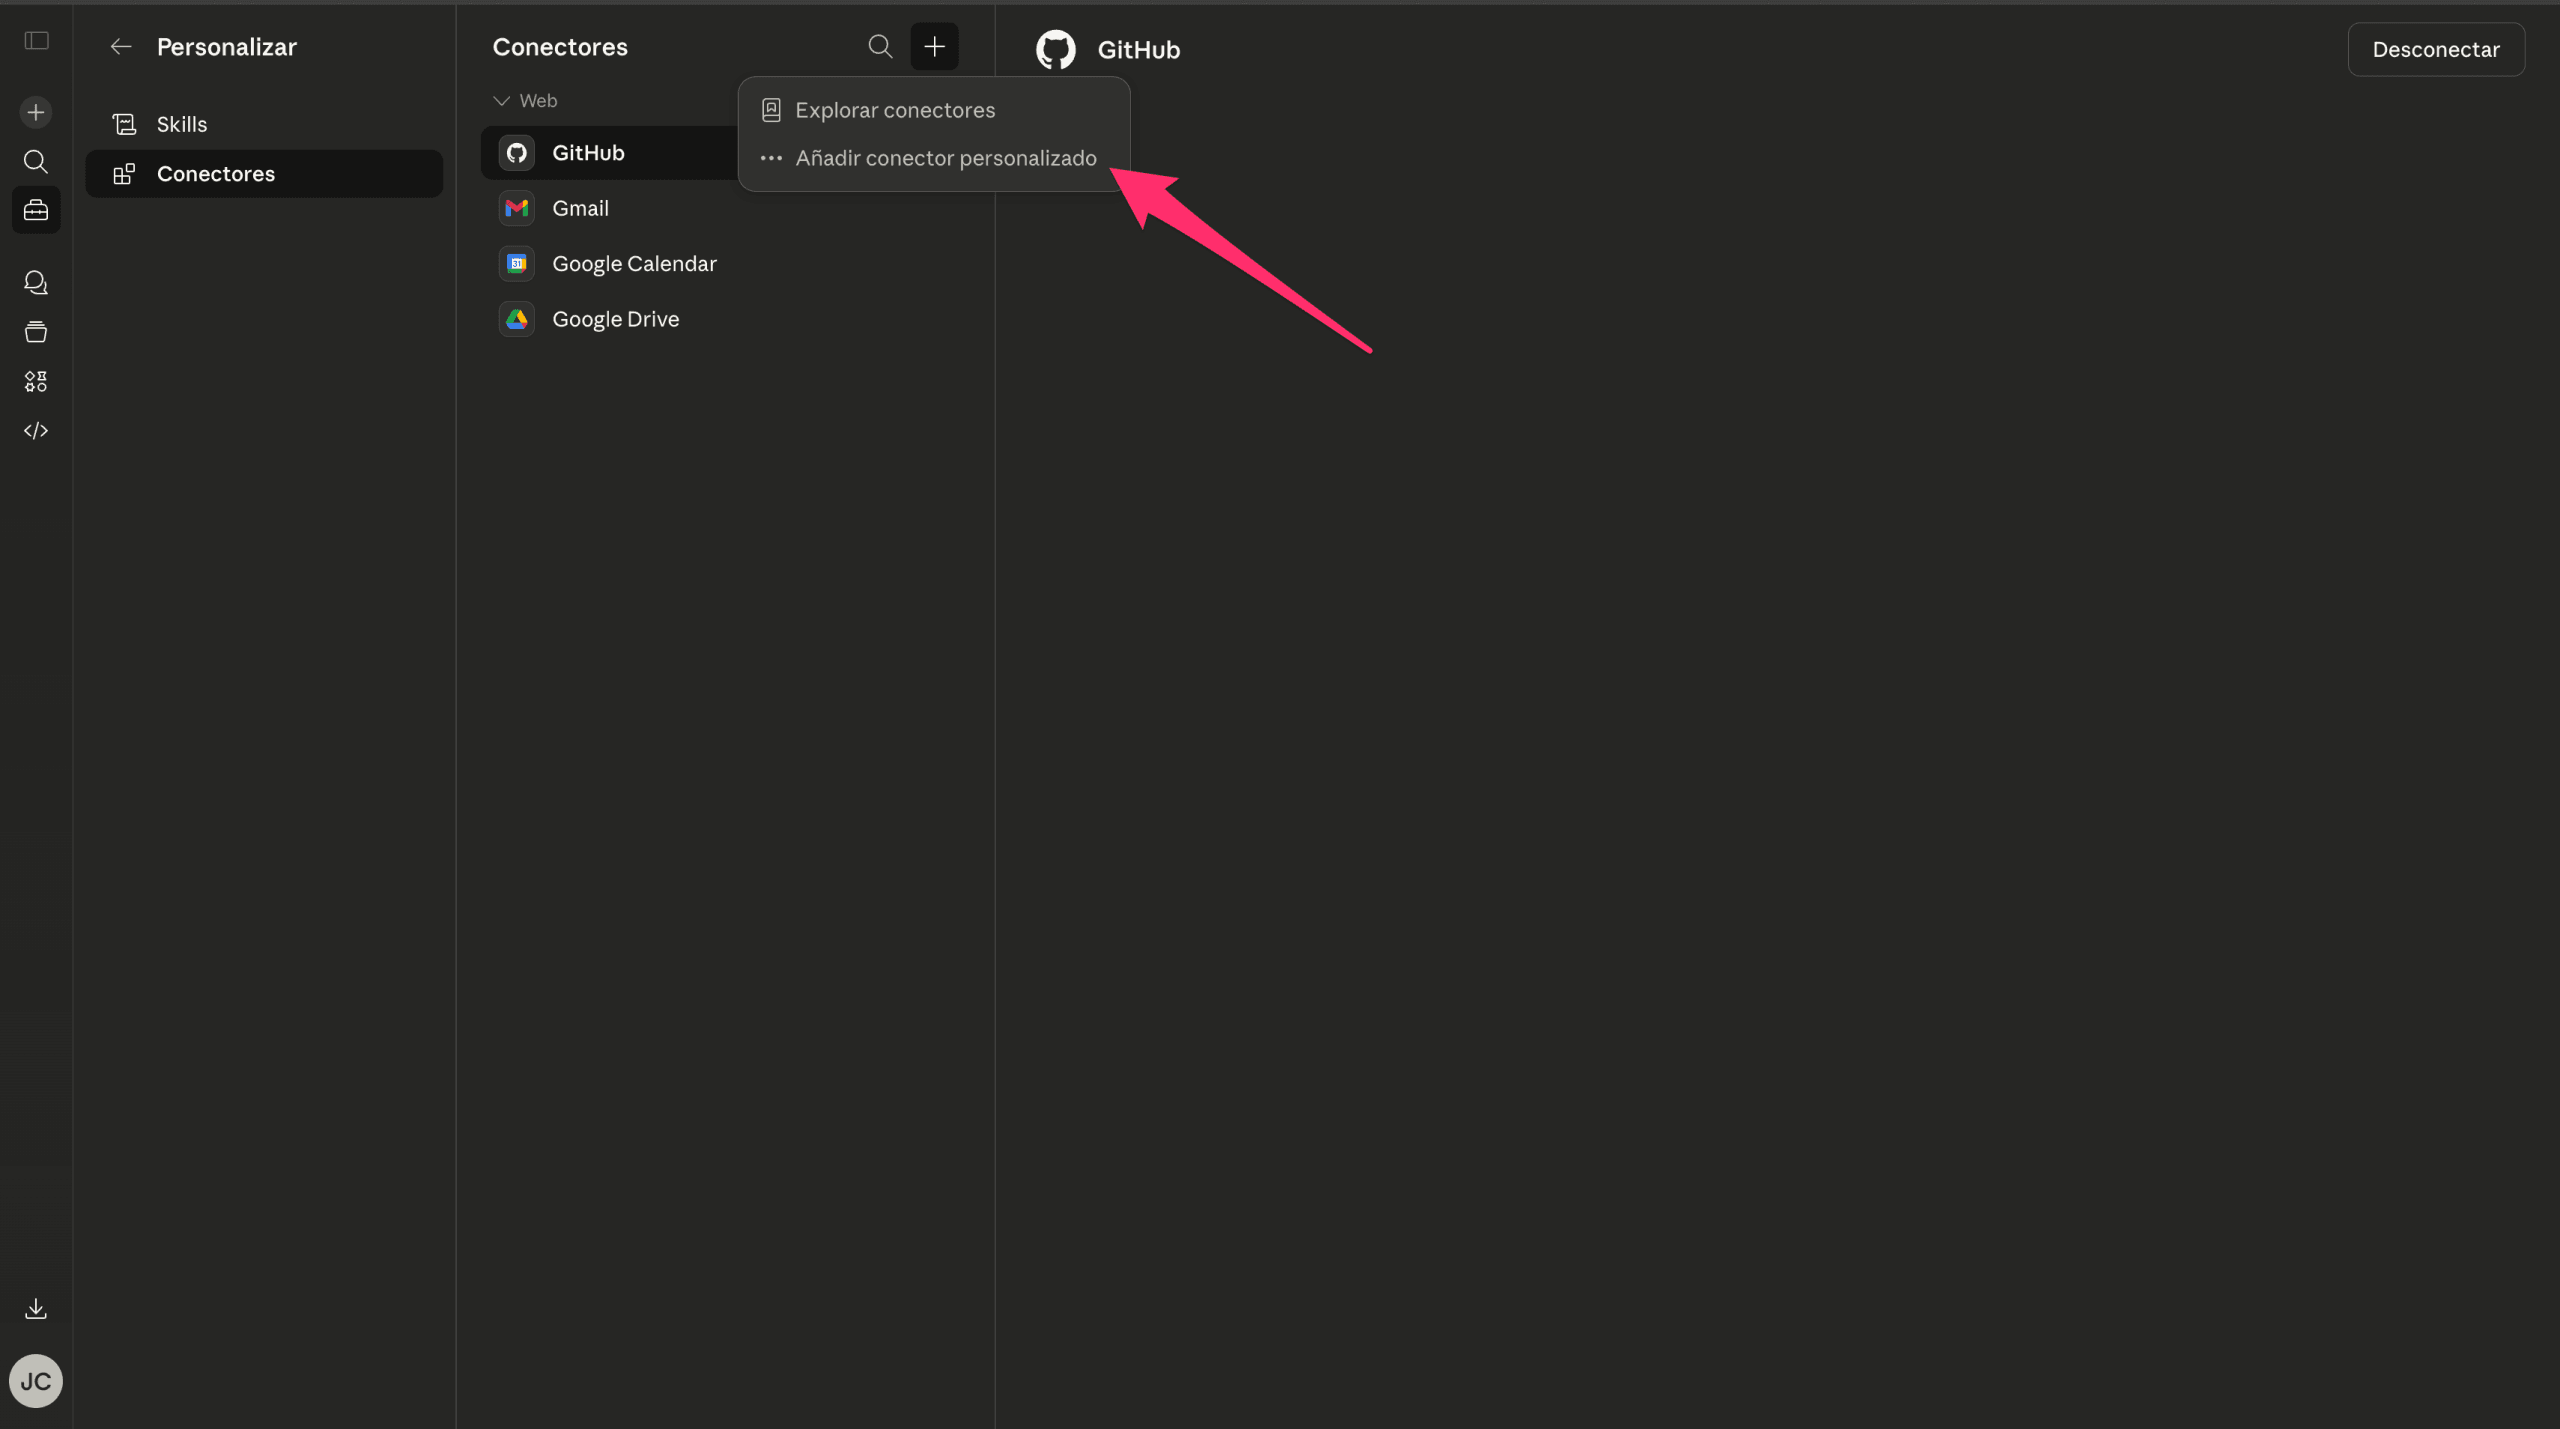
Step 4: Select 'Add custom connector'
When you click the + button, a dropdown menu will appear with two options: Explore connectors (for official connectors) and Add custom connector. Select this second option, as MCP Content Manager is a custom connector that connects to your own WordPress server.
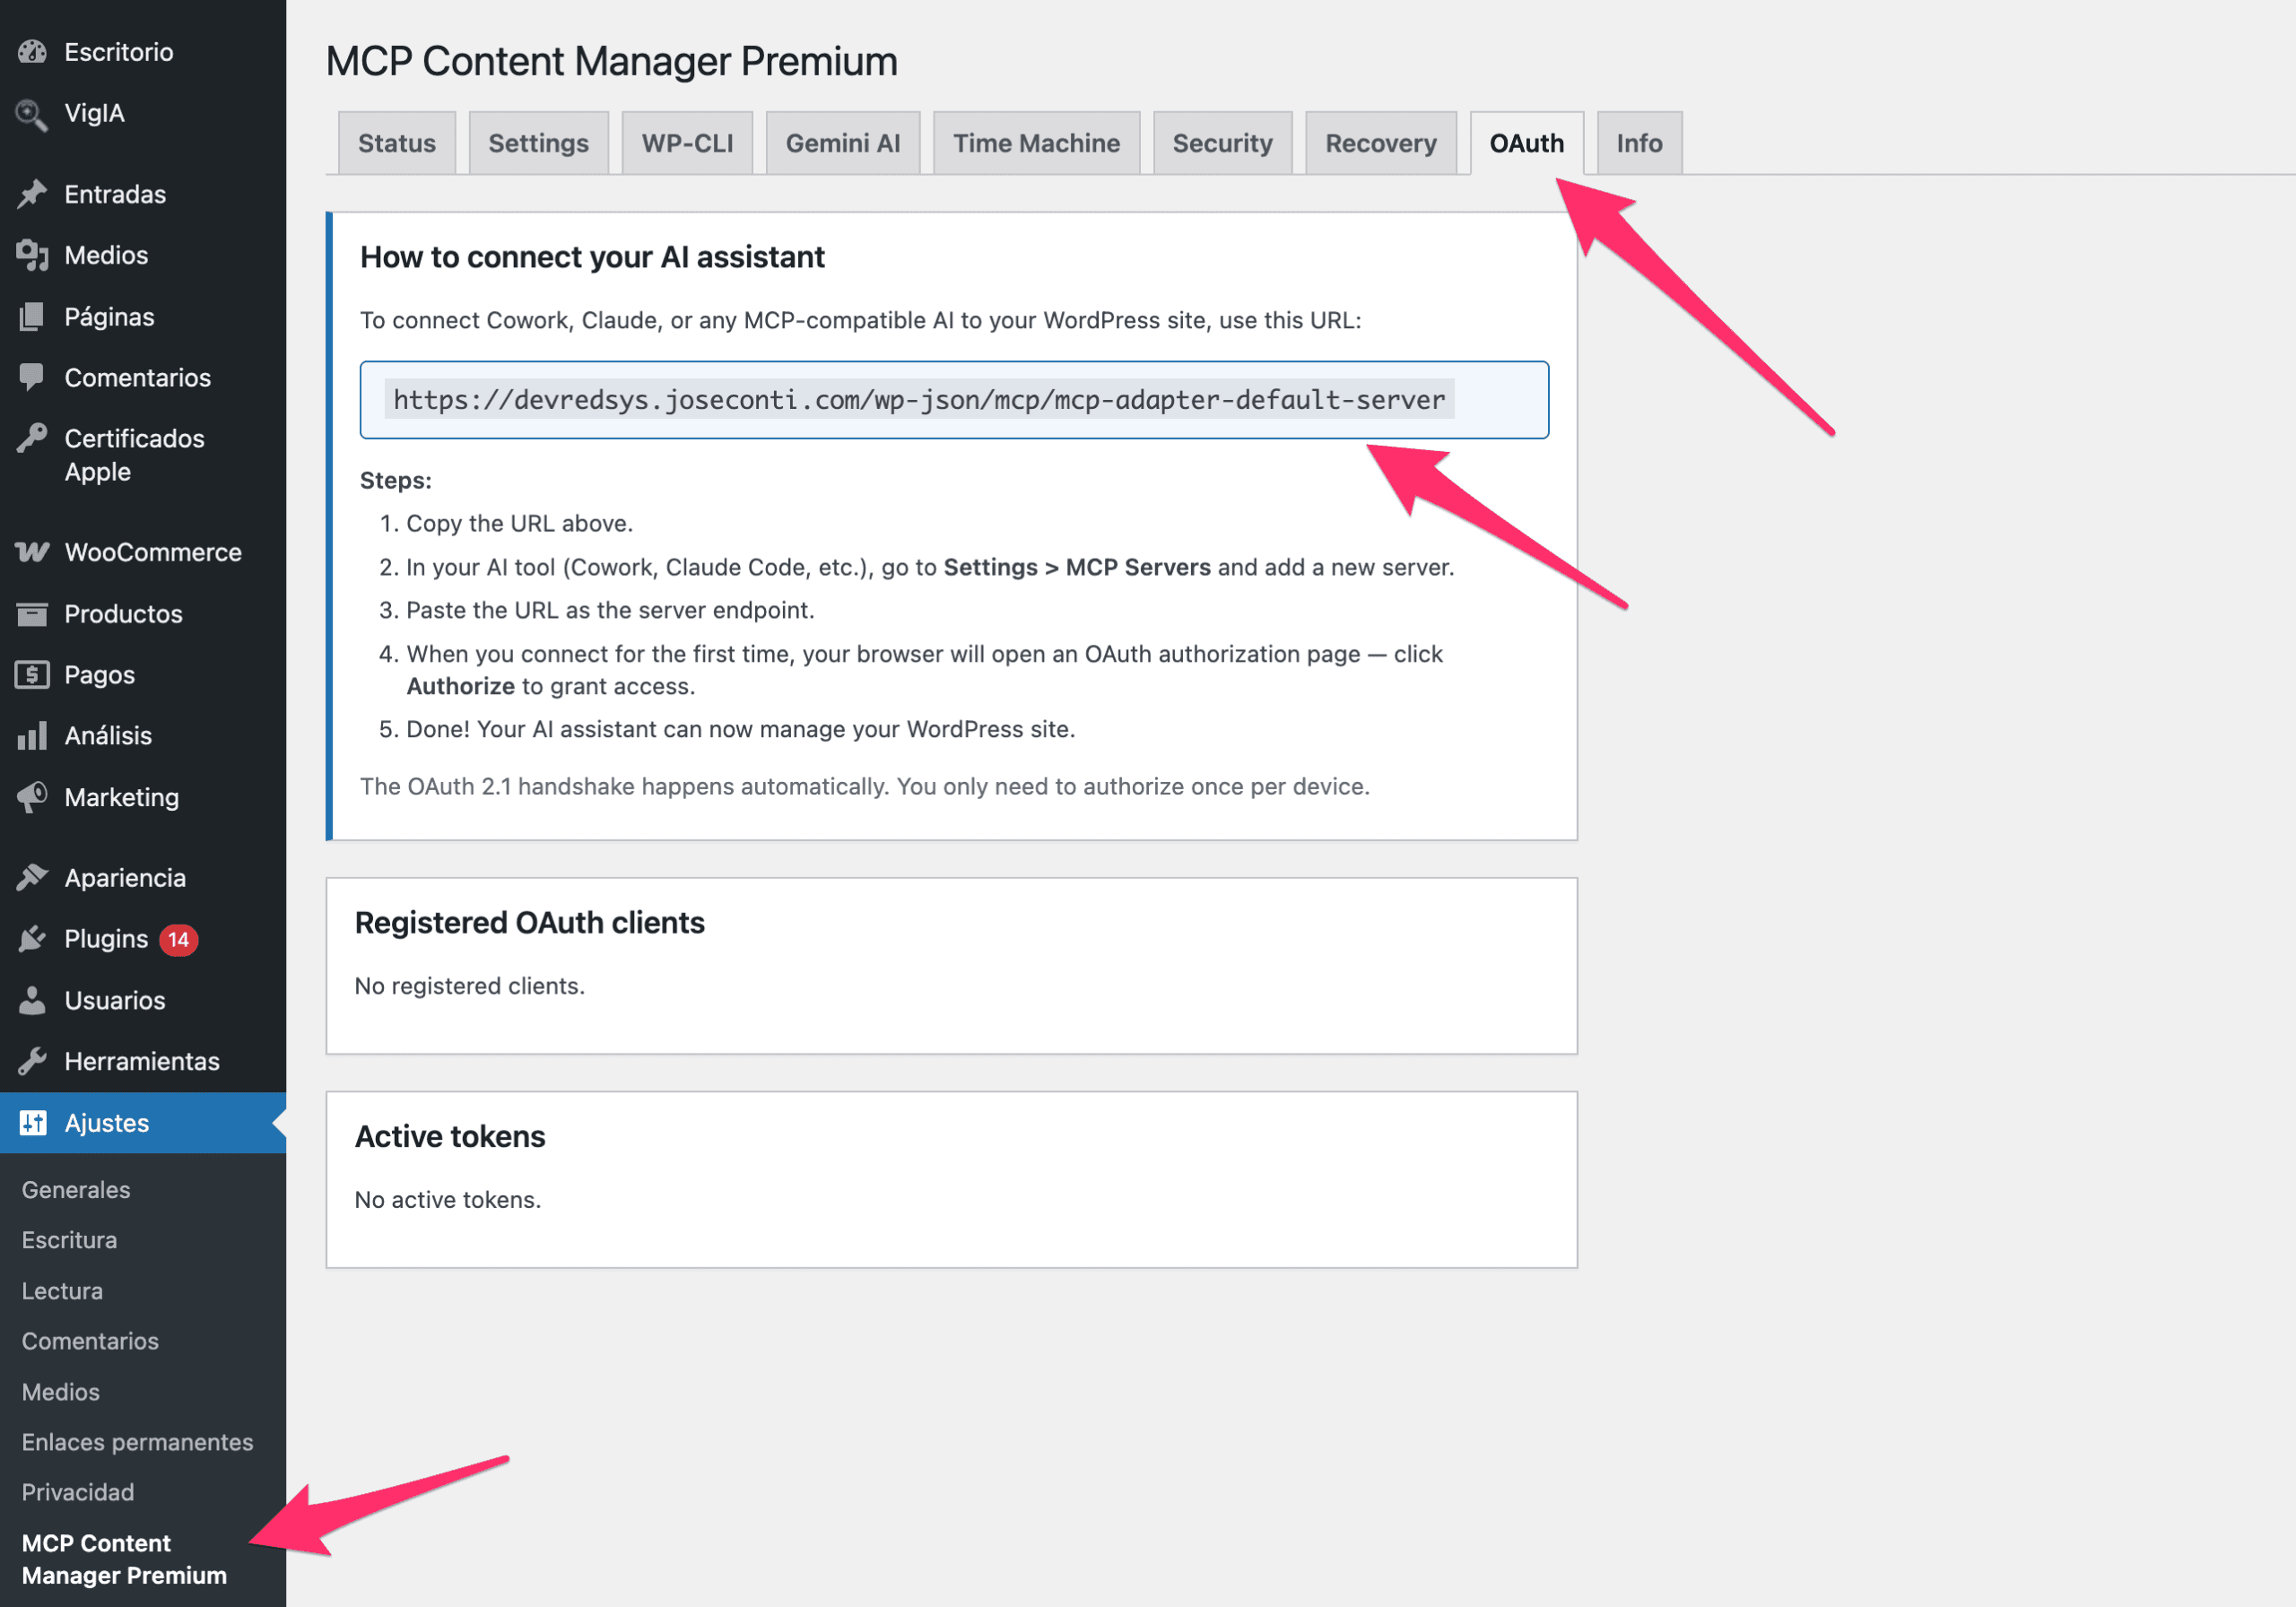
Step 5: Get the MCP server URL in WordPress
Before filling out the form in Claude, you need to obtain the URL of your MCP server. To do this, go to your WordPress admin panel and navigate to Settings → MCP Content Manager Premium. Once there, click on the tab OAuth.
In this tab, you will find the section 'How to connect your AI assistant' with the URL of your MCP server. This URL has the format:
https://tusitio.com/wp-json/mcp/mcp-adapter-default-serverCopy this URL, you will need it in the next step.
Step 6: Configure the connector in Claude
Go back to Claude, where you will have the form 'Add custom connector'. Fill in the two fields:
- Name: Enter an identifying name for your site (for example, your website's domain).
- Remote MCP server URL: Paste here the URL you copied in the previous step from the OAuth tab of your WordPress.
Once the fields are completed, you will see how it is configured with your site name and the MCP server URL.

Click the button Add to save the connector.
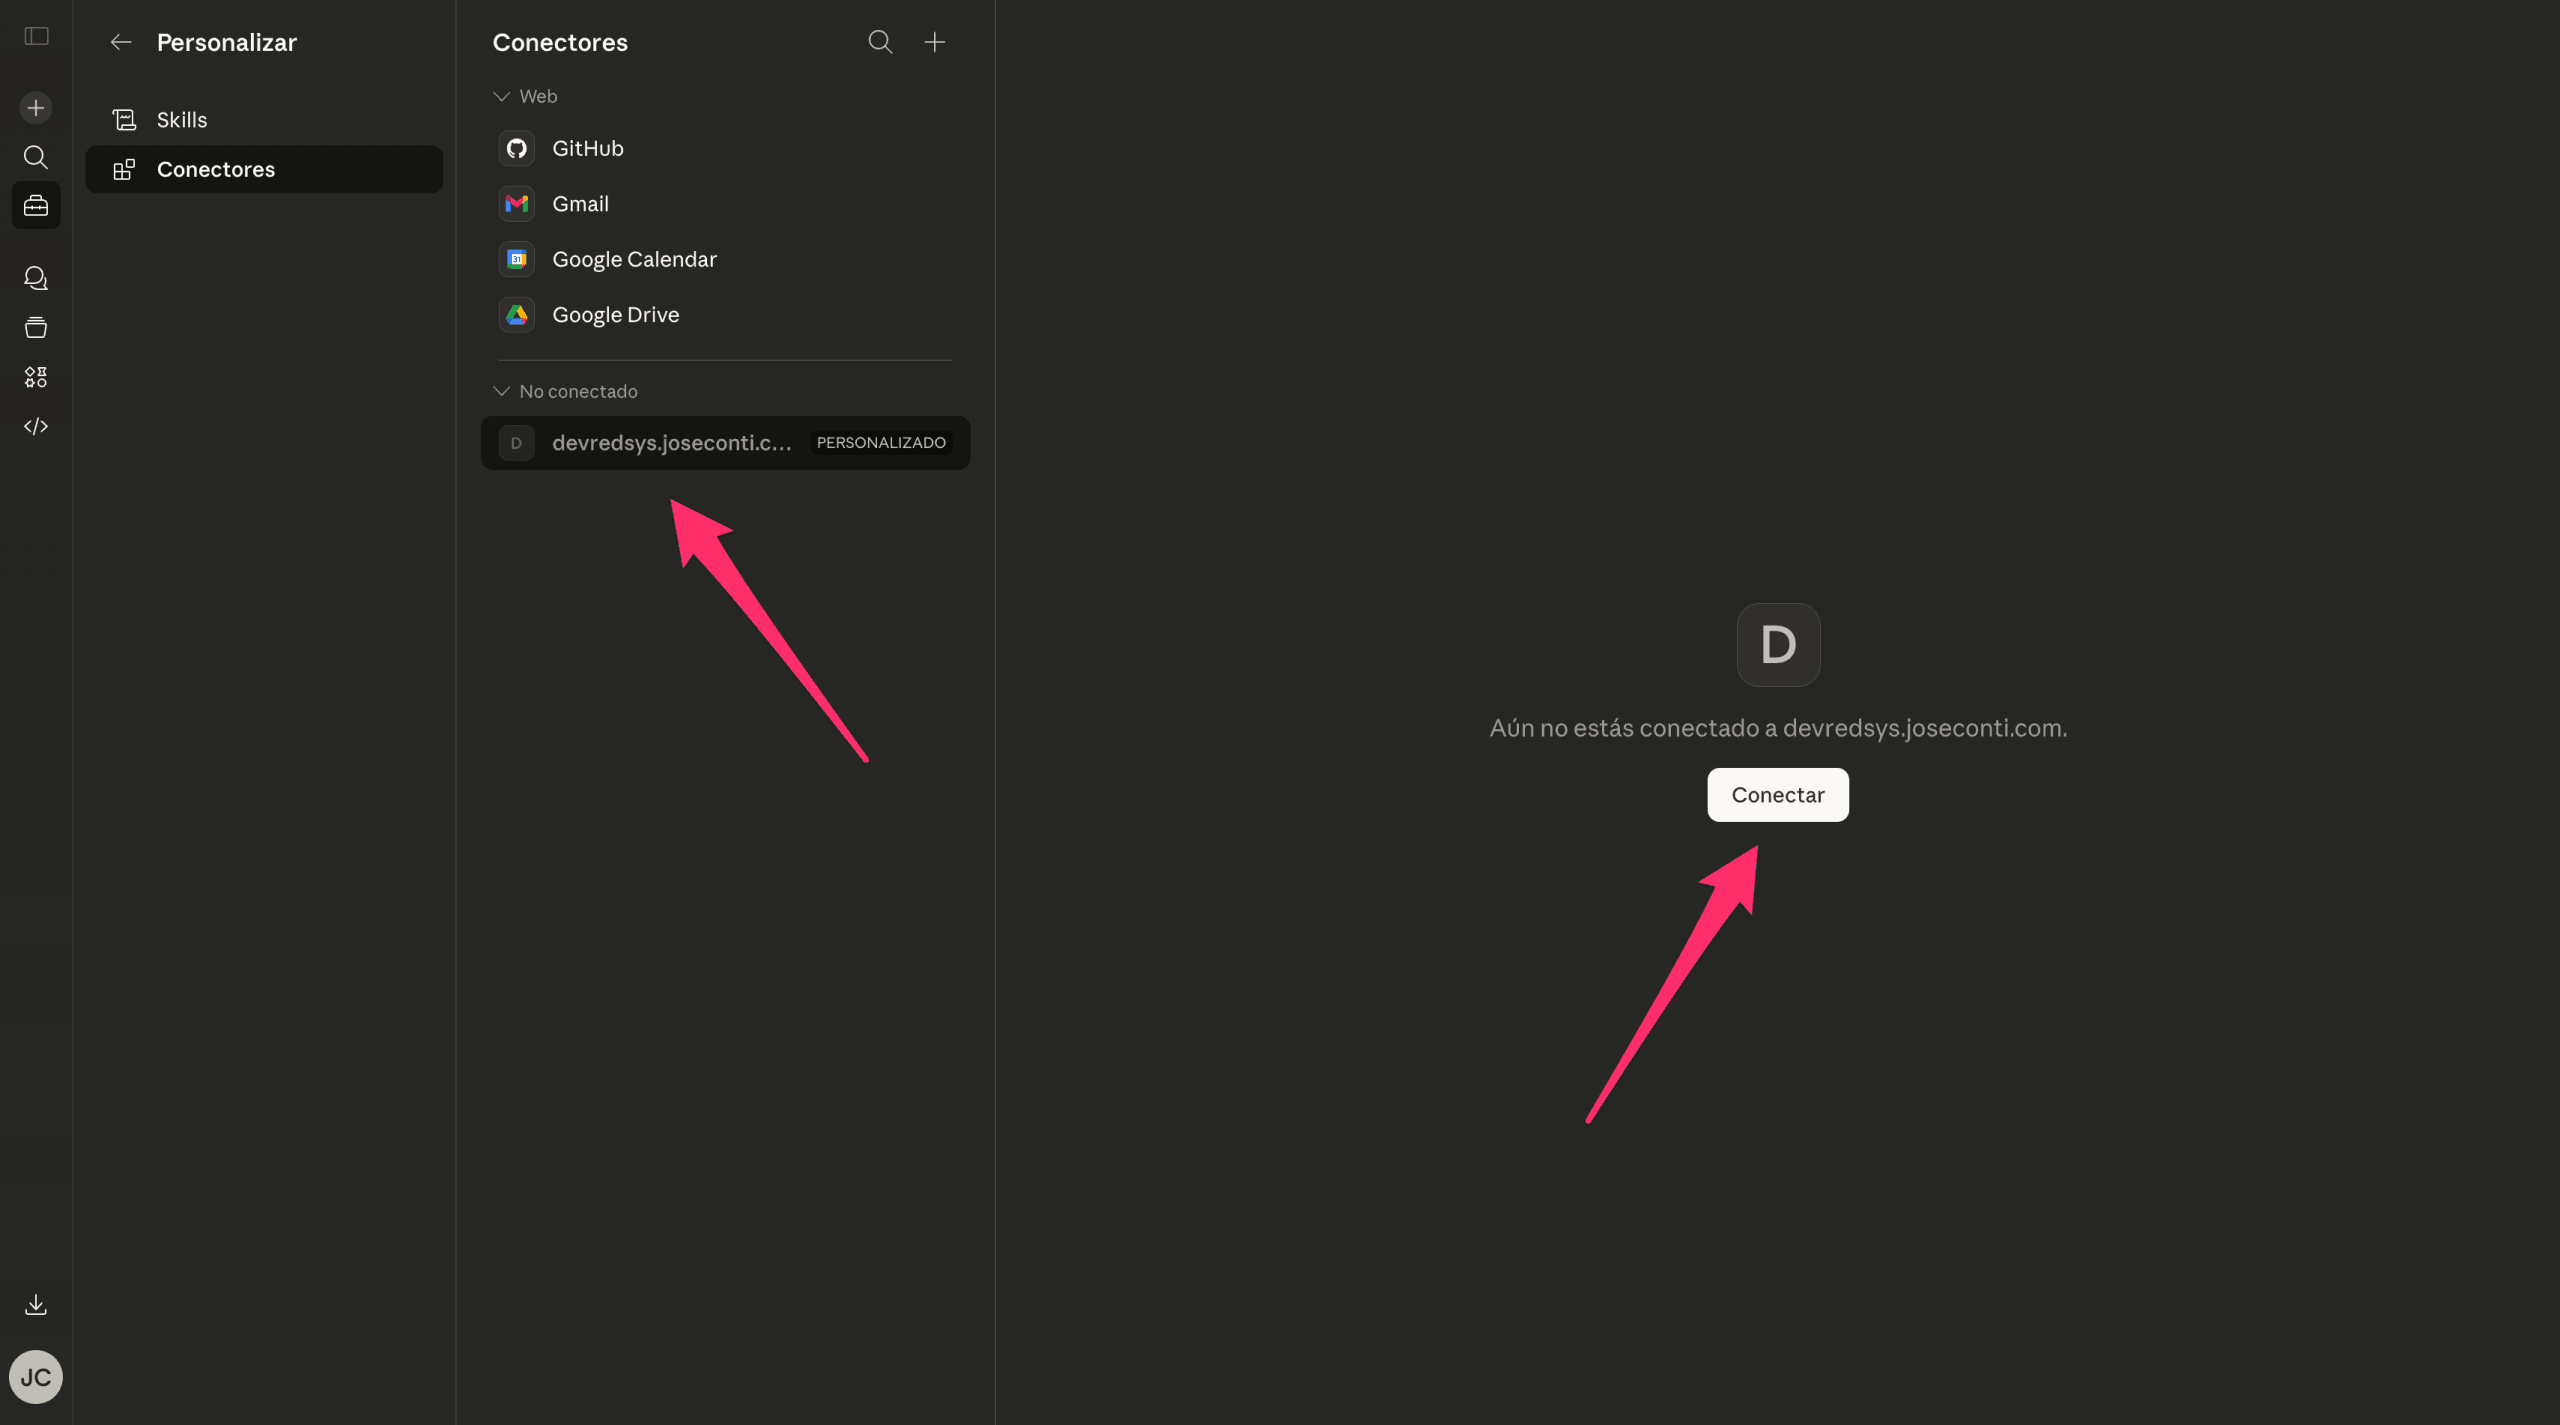
Step 7: Connect to your WordPress site
After adding the connector, it will appear in the list of connectors with the status 'Not connected' and the label CUSTOM. To establish the connection, click on the connector and then press the button Connect.
Step 8: Authorize the OAuth connection
When you click Connect, an authorization window for your WordPress site will open. This page will show you the permissions that Claude requests to connect to your site:
- Use MCP tools to manage content — Allows using MCP tools to manage content.
- Read content from your site — Allows reading the content of your site.
- Create and modify content on your site — Allows creating and modifying content on your site.
Verify that you are logged in with your WordPress user (it will appear as 'Logged in as [your name]') and click the blue button Authorize to grant the permissions.
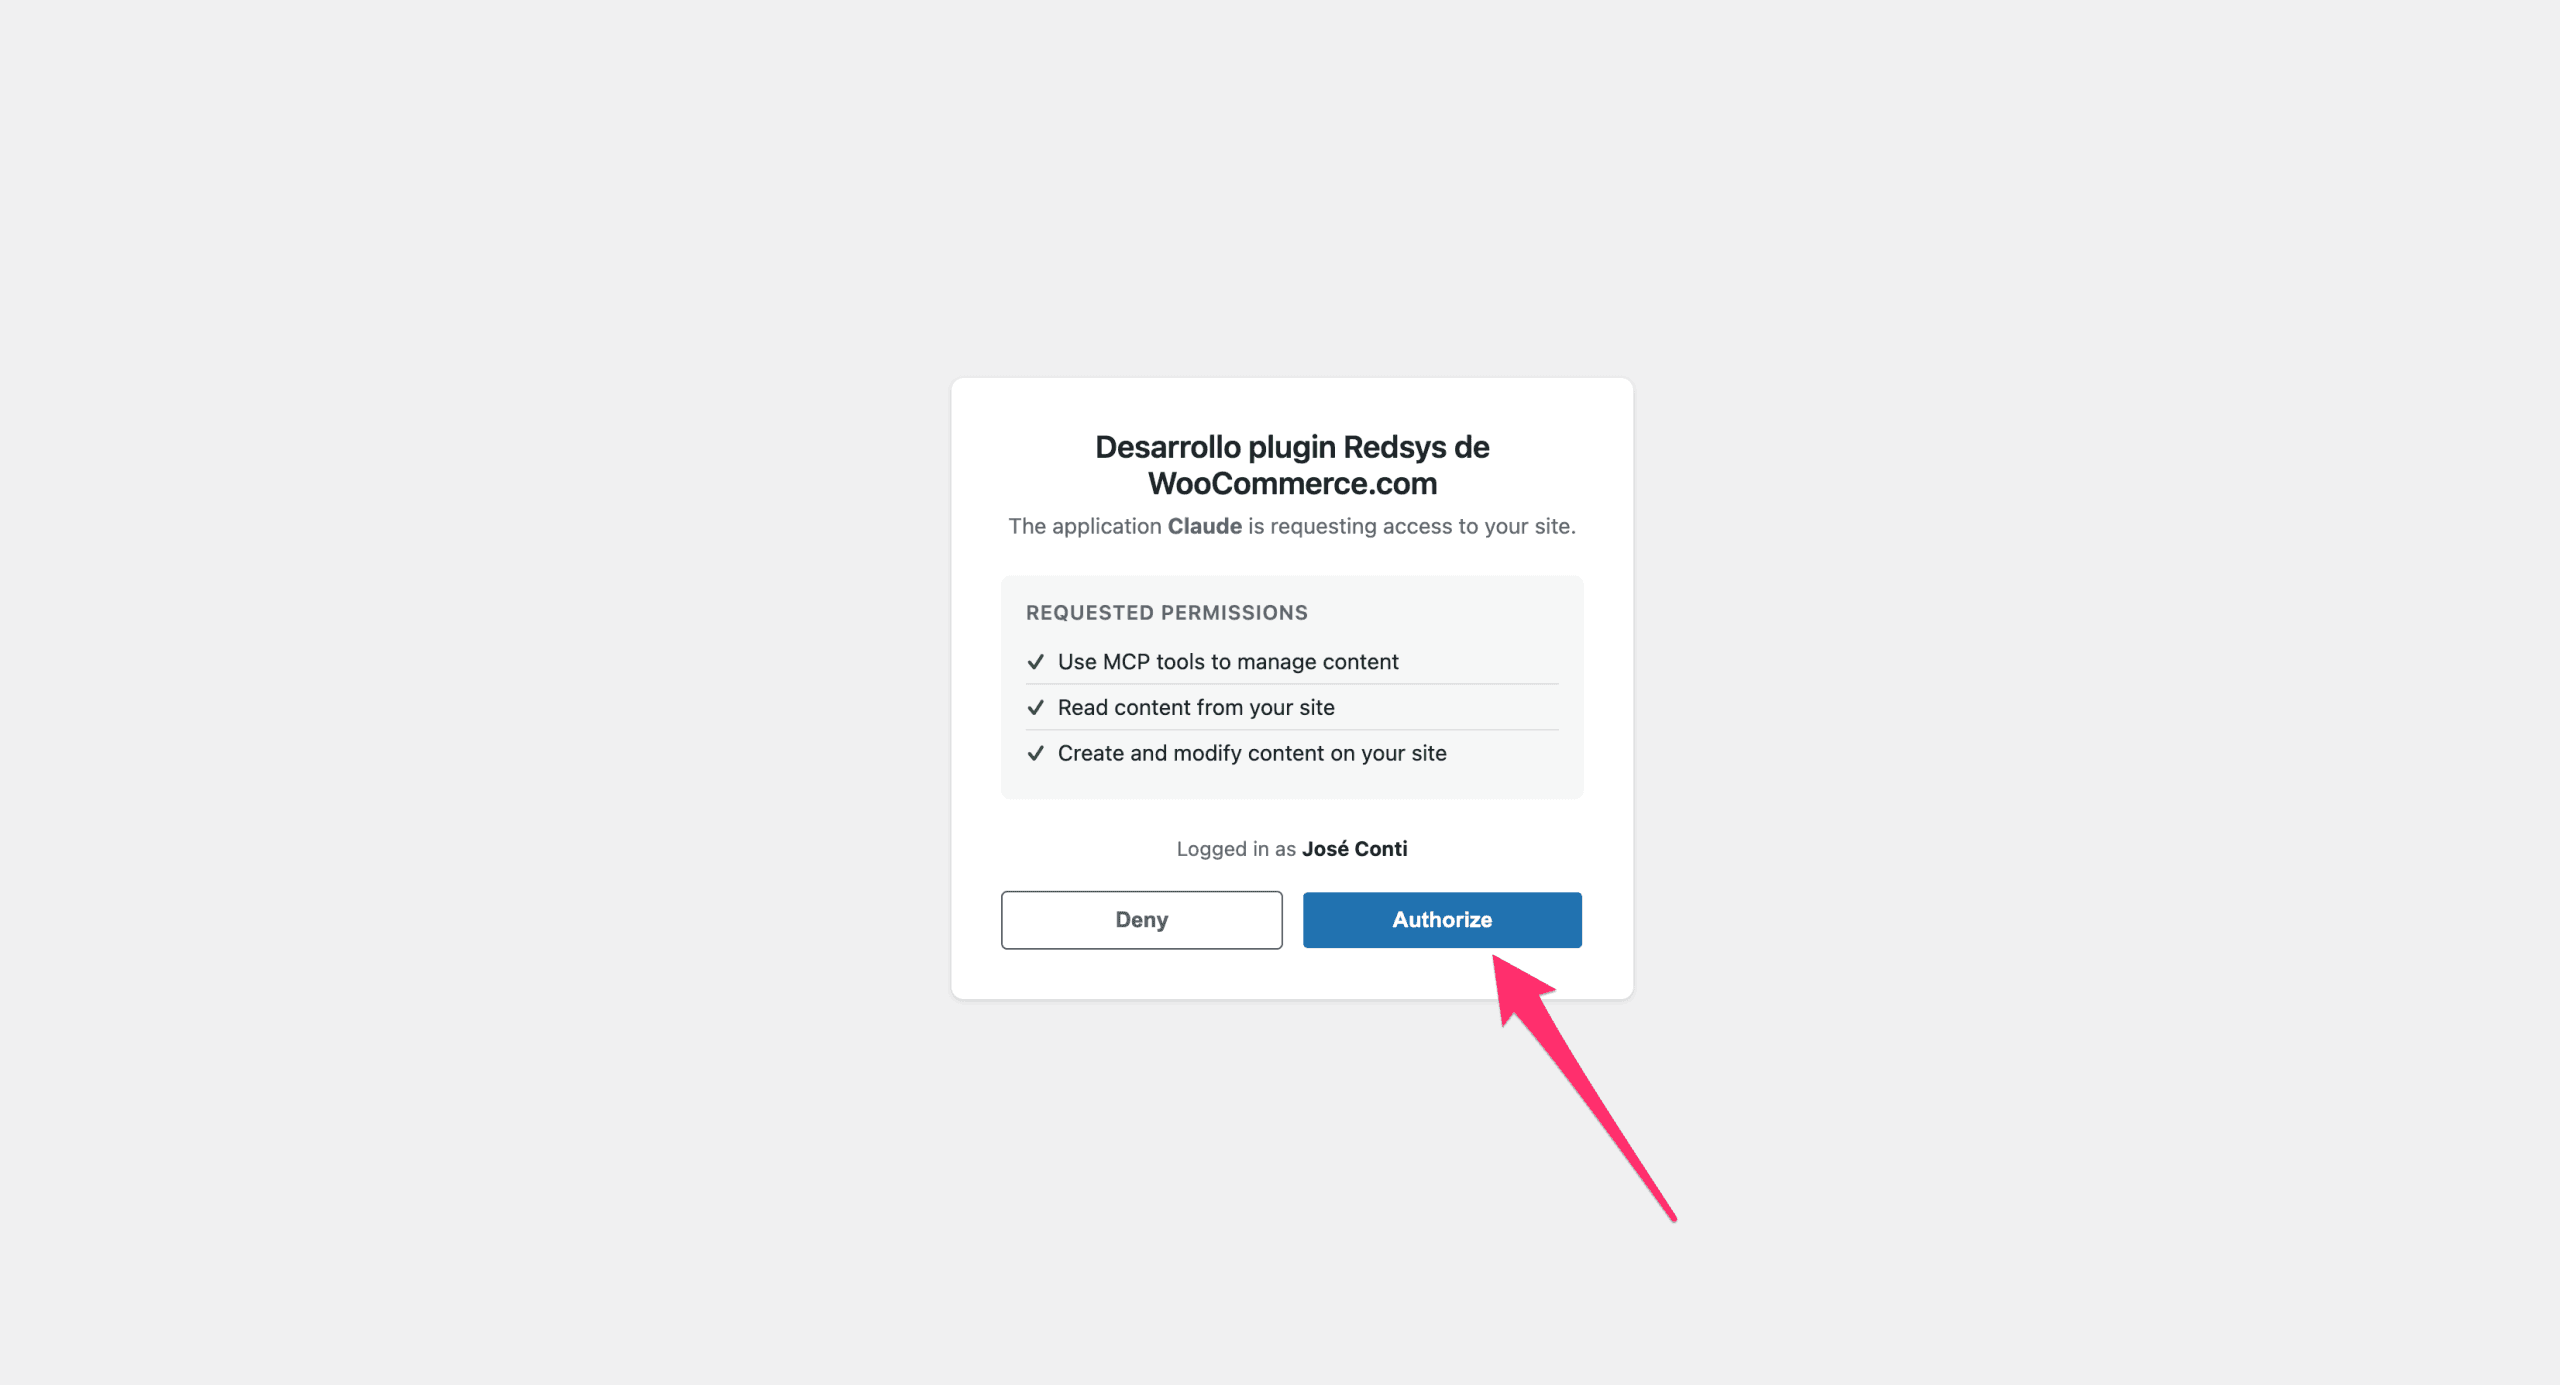
Authorization is done via OAuth 2.1, a secure protocol that does not require sharing your WordPress password with Claude. You will only need to authorize once per device.
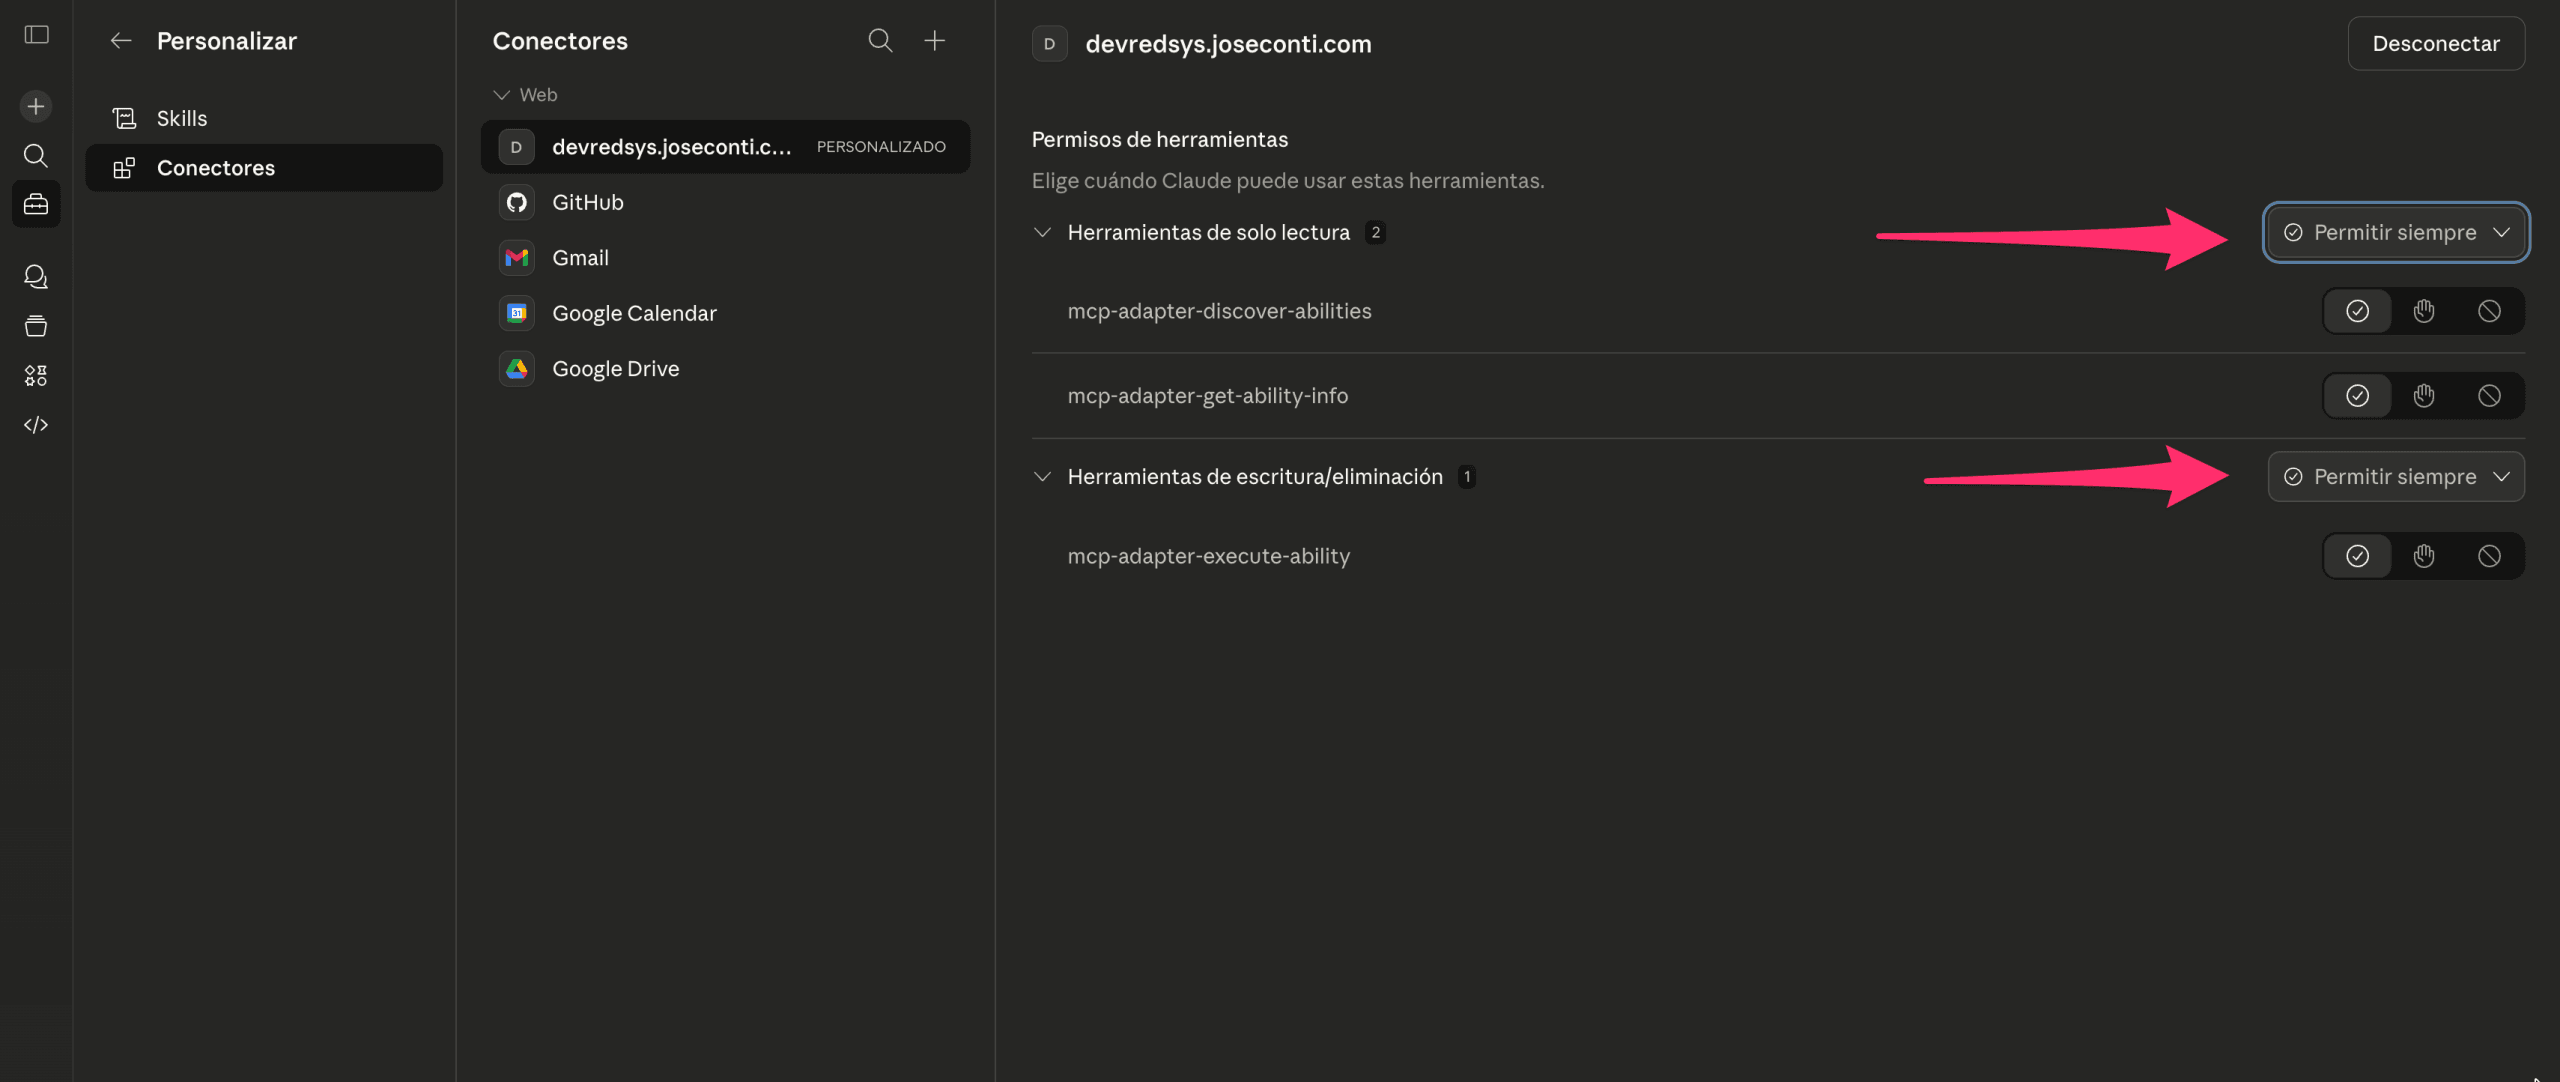
Step 9: Configure tool permissions
Once the connection is authorized, Claude will show the connector as connected and will allow you to manage the tool permissions. You will see two groups of tools, note that this screen may change a bit and may look different.
- Read-only tools — Include
mcp-adapter-discover-abilitiesandmcp-adapter-get-ability-info, which allow Claude to discover the capabilities available on your site. - Write/delete tools — Include
mcp-adapter-execute-ability, which allows Claude to perform actions such as creating, editing, or deleting content.
For each group of tools, select 'Always allow' in the corresponding dropdown. This will prevent Claude from asking for confirmation every time it needs to use a tool, making the experience much smoother.
Connection completed!
Your WordPress site is now connected with Claude through MCP Content Manager Premium. From now on, you can ask Claude to manage your WordPress content directly from the conversation. Some of the things you can do:
- Create posts and pages with full Gutenberg formatting.
- Edit existing content without needing to open the WordPress editor.
- Manage categories and tags automatically.
- Upload images to the media library.
- Set up SEO (title, description, focus keyword) if you have Yoast SEO or Rank Math.
- Check the structure of your site: content types, custom fields, taxonomies.
Just type in Claude what you need to do with your WordPress site and it will take care of the rest.
Troubleshooting
If you encounter any issues during setup, check these points:
- Error connecting: Verify that the MCP server URL is correct and that your site is publicly accessible.
- Authorization not completed: Make sure you are logged into WordPress with an administrator account before clicking Authorize.
- Tools not appearing: Check that the MCP Content Manager Premium plugin is activated and updated to the latest version.
- Permission error: Check that your WordPress user has Administrator role.
If you need additional help, you can contact us through the support section.