

You can request the certificate free of charge from the My Account area if you have purchased the €79 license. If you purchased the plugin on WooCommerce.com and do not yet have an account on this site, you will need to request that I create one for you.
If you do not have an plugin license, you will need to acquire an Apple Developer account, which costs €99/year, and create all the necessary certificates for its operation.
Apple Pay must be active on your terminal with integration on the site, or it will not work. You must request it from your bank and then in the email, have them activate it with integration on the site or via redirection and integration on the site, whichever you prefer.
It is very important that you know that you can only request the certificate if it complies with Apple’s terms. If your website belongs to any of the prohibited groups, I will not be able to create the certificates for you.
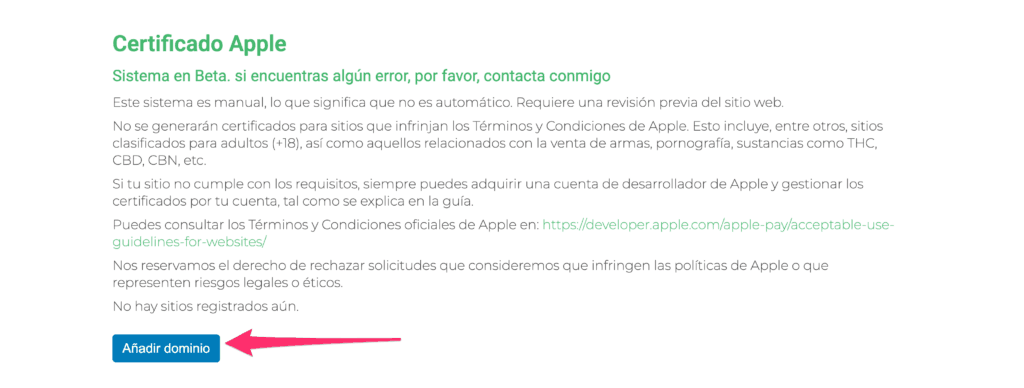
To get started, go to the Apple Certificate section in My Account, you will see a button that says “Add Domain”
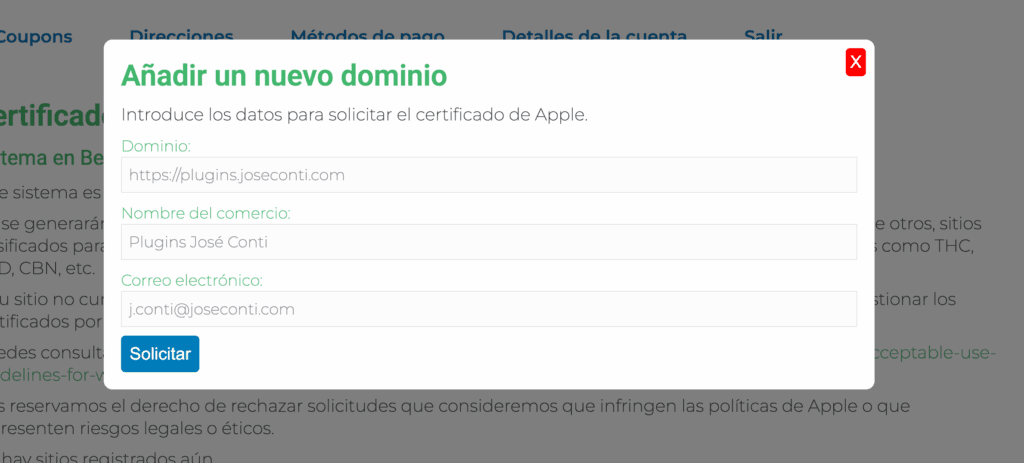
When you press it, a small form will appear that you must fill out. In the domain field, you must enter exactly the domain where the Apple Pay button will load, that is, if your website loads with www in front, you must add it that way, and vice versa. Then enter your company name and your email address and click on “Request”.
Once you click on Request, it will look something like this, but with your data. You will see that the Status says “Requested”

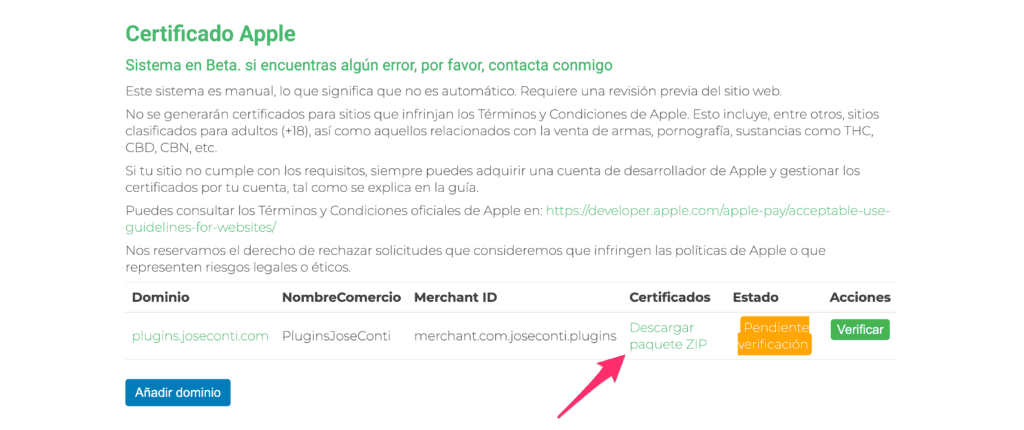
I will perform a site inspection to see if it complies with Apple’s policies, so it must be public or I will not be able to generate them. Once I generate everything, you will receive an email notifying you that you can now download the package with everything and the status will change to Pending Verification. We will download the ZIP package to our computer.
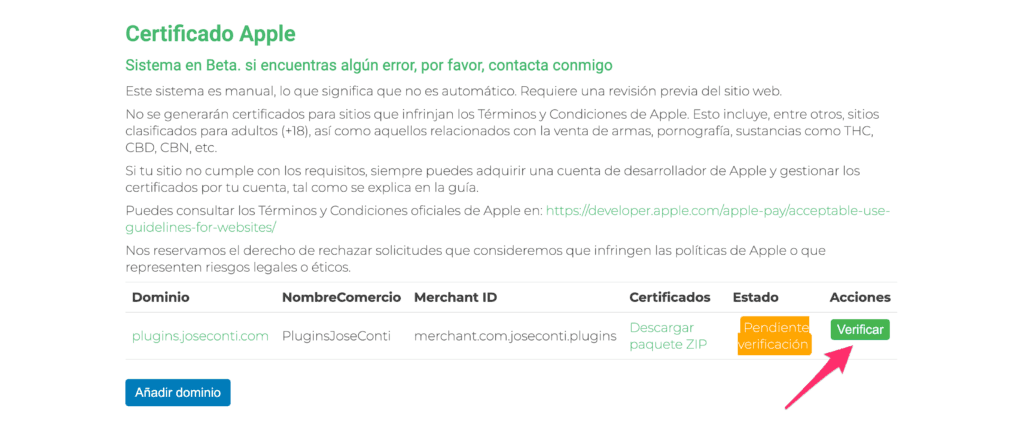
Once downloaded, we will extract it, and inside we will see that there is a file called “apple-developer-merchantid-domain-association.txt”. This file will be uploaded to the .well-known directory. Once uploaded, check if the file loads in the browser by visiting the address https://your-domain.tls/.well-known/apple-developer-merchantid-domain-association.txt If it loads correctly, click on the “Verify” button
Once clicked, the status will change to Processing Verification.
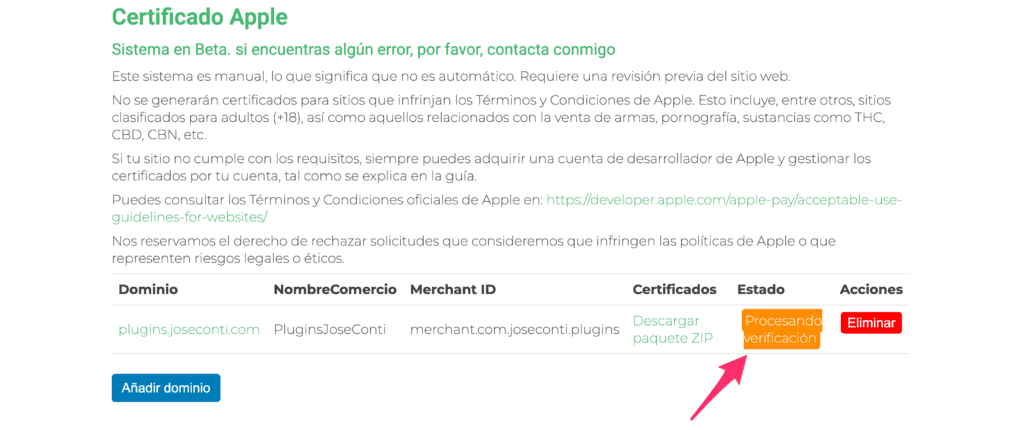
I will check that the verification file is correctly uploaded, and if it is, I will proceed to verify it with Apple. Once verified correctly, you will receive an email notifying you that it is verified, and the status will change to Completed.
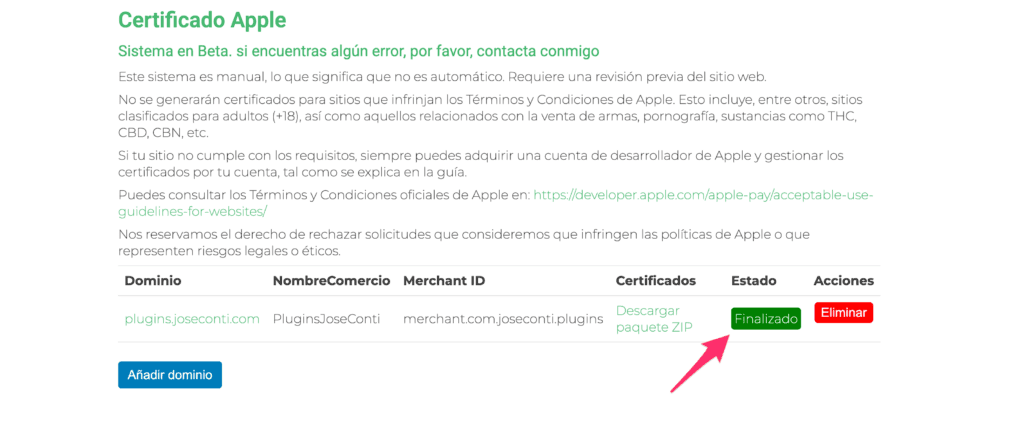
From this moment on, you have everything you need to configure Apple Pay on your site.
Now we will proceed to configure Apple Pay on our site. It will not work yet as Redsys needs to configure a certificate, but we must ensure that we have done everything correctly so far, and the way to do this is to test it on our site.
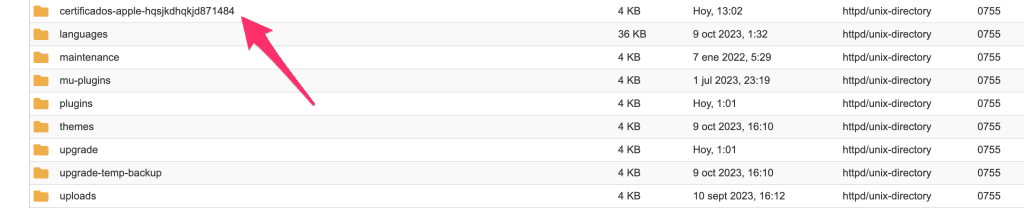
First, we will need to access via FTP or through the file manager of our server to wp-content.
There we will create a directory with a random name, whatever it is, I don’t care, you can put “certificados-apple” in front so you know what it is about and don’t accidentally delete it in the future, so it would look something like this, certificados-apple-hqsjkdhqkjd871484. Use English characters, do not put accents, tildes, umlauts, etc. in the name. This is just an example and for security, you should not use what I have put in the example.
We access it, and upload the files merchant_id.pem and merchant_id.key that we will find in the ZIP you downloaded.

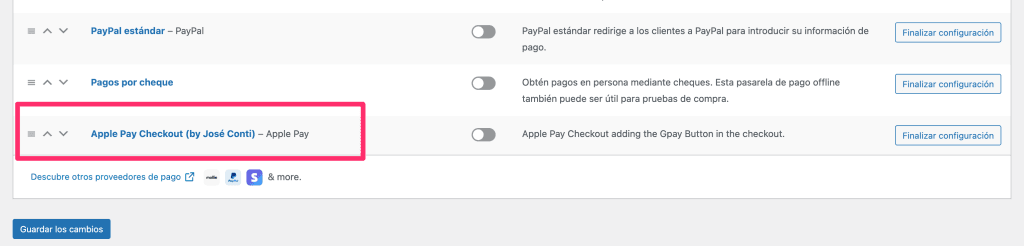
Now we will go to the Apple Pay settings in WordPress, which we will find in WooCommerce > Settings > Payments > Apple Pay Checkout (by Jose Conti). The name may be translated depending on the WP localization you are using.
Here we will need to add all the standard Redsys data, which are the FUC, Terminal, and Sha256, which is like any other Redsys method. In principle, this data will be the same as the redirection data, unless your bank indicates otherwise, but what we are interested in are the Apple data, as they are specific to this method.
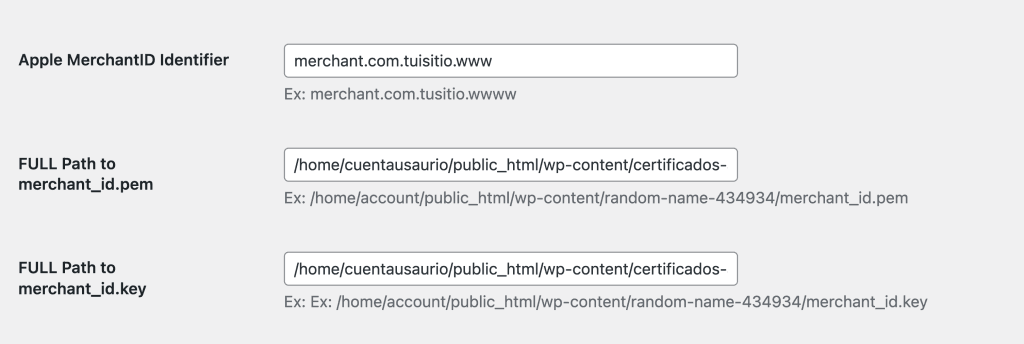
We will need to configure three fields, Apple Merchant Identifier, which will be the name. You will find the Identifier in My Account, in the example it would be “merchant.com.joseconti.plugins”

And then the absolute PATH of where you have placed the certificate files. It is especially the absolute path, not relative. For example (this is just an example, do not copy and paste because it will not work);
- /home/username/public_html/wp-content/certificados-apple-hqsjkdhqkjd871484/merchant_id.pem
- /home/username/public_html/wp-content/certificados-apple-hqsjkdhqkjd871484/merchant_id.key
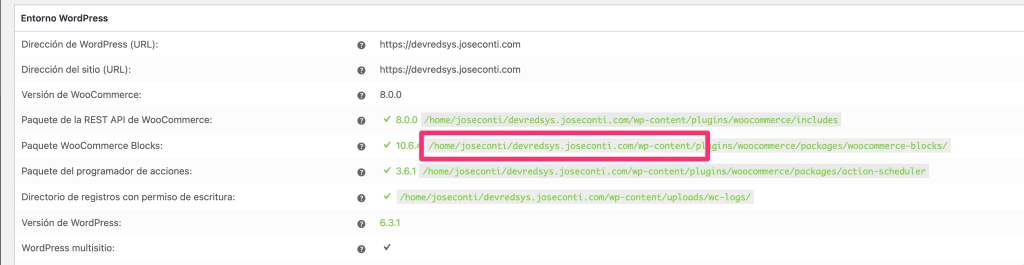
This varies greatly from server to server, so if you have doubts about what the absolute path is, you can go to WooCommerce > Status > and there you can see the absolute path to wp-content, and you should only add the rest to the path.
The final result would look something like this, but with your data
Once everything is done and configured and the method activated, you can go and test it on the front end. Above all, the test should be performed from an Apple device, and if it’s a Mac, with Safari. Obviously, you need to have Apple Pay active on your device. What test should we perform? Well, buy something. If everything is correct, at checkout you should see a red error message at the top indicating that there is an error obtaining the merchant keys. That is correct because we have not yet completed the last step.
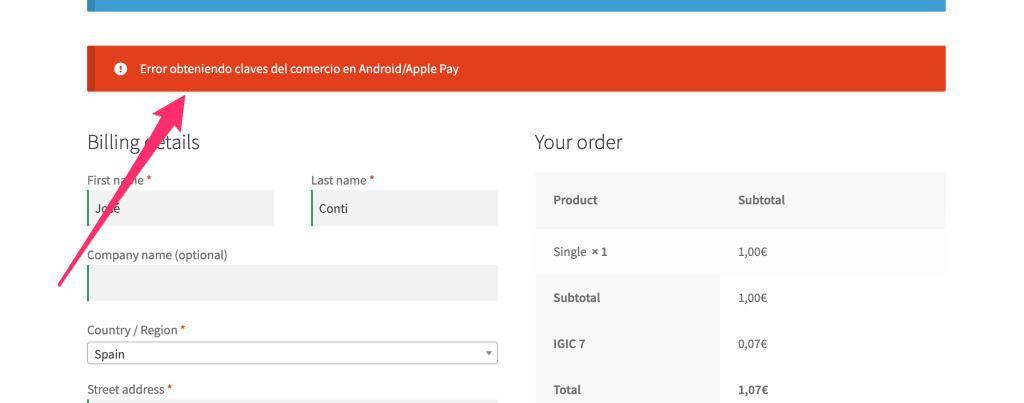
Why does this error appear? This error appears because your site has contacted Apple correctly, but when it sends the necessary information to Redsys, Redsys is unable to understand it because it does not have your certificate. This means that the certificates on the site are correct, so we can proceed with the last step. In case there is another error, we have probably made some mistake in the previous steps, so we will likely need to start over, but open a ticket to be sure.
Obviously, the last step is to provide the data to Redsys. We will need to send them the Merchant ID Identifier, which in the example would be “merchant.com.joseconti.plugins”, and the file ecckey_pkcs8.key.txt that you will find in the ZIP.
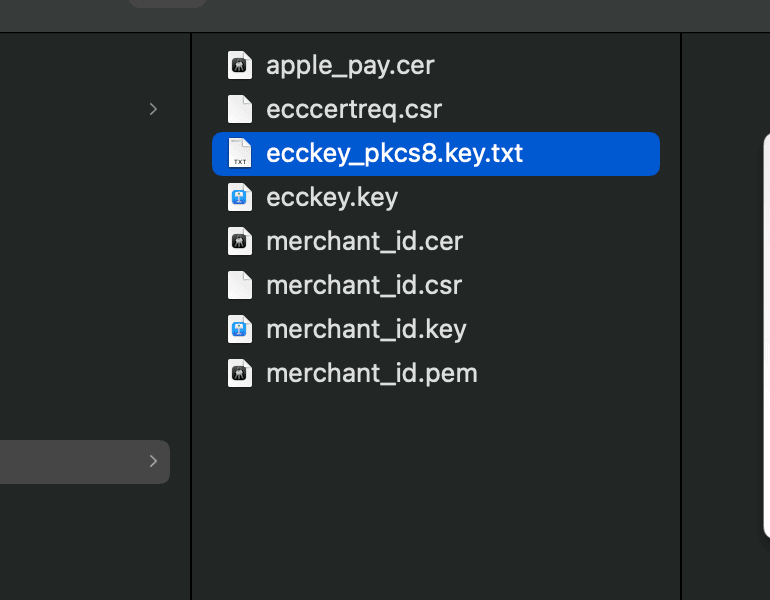
This file can be sent without problems as I have already prepared it for the antivirus systems of Redsys to accept it.
Important note. Apple Pay on Redsys ONLY works on the real terminal, it does not work on the test terminal. In the plugin, I have put the test option, but it is a bit testimonial and in case you want to test Apple Pay without being charged and knowing that there will be an error in the payment for sure. Orders will never be marked as paid and will show an error.
When they confirm from Redsys that they have configured it with what you have sent them, you can test Apple Pay on the real terminal and see if the whole process works correctly. You can test it on any OS and browser, but in the case that it is not a Mac and on Safari, you will need an iPhone.